Install WireGuard
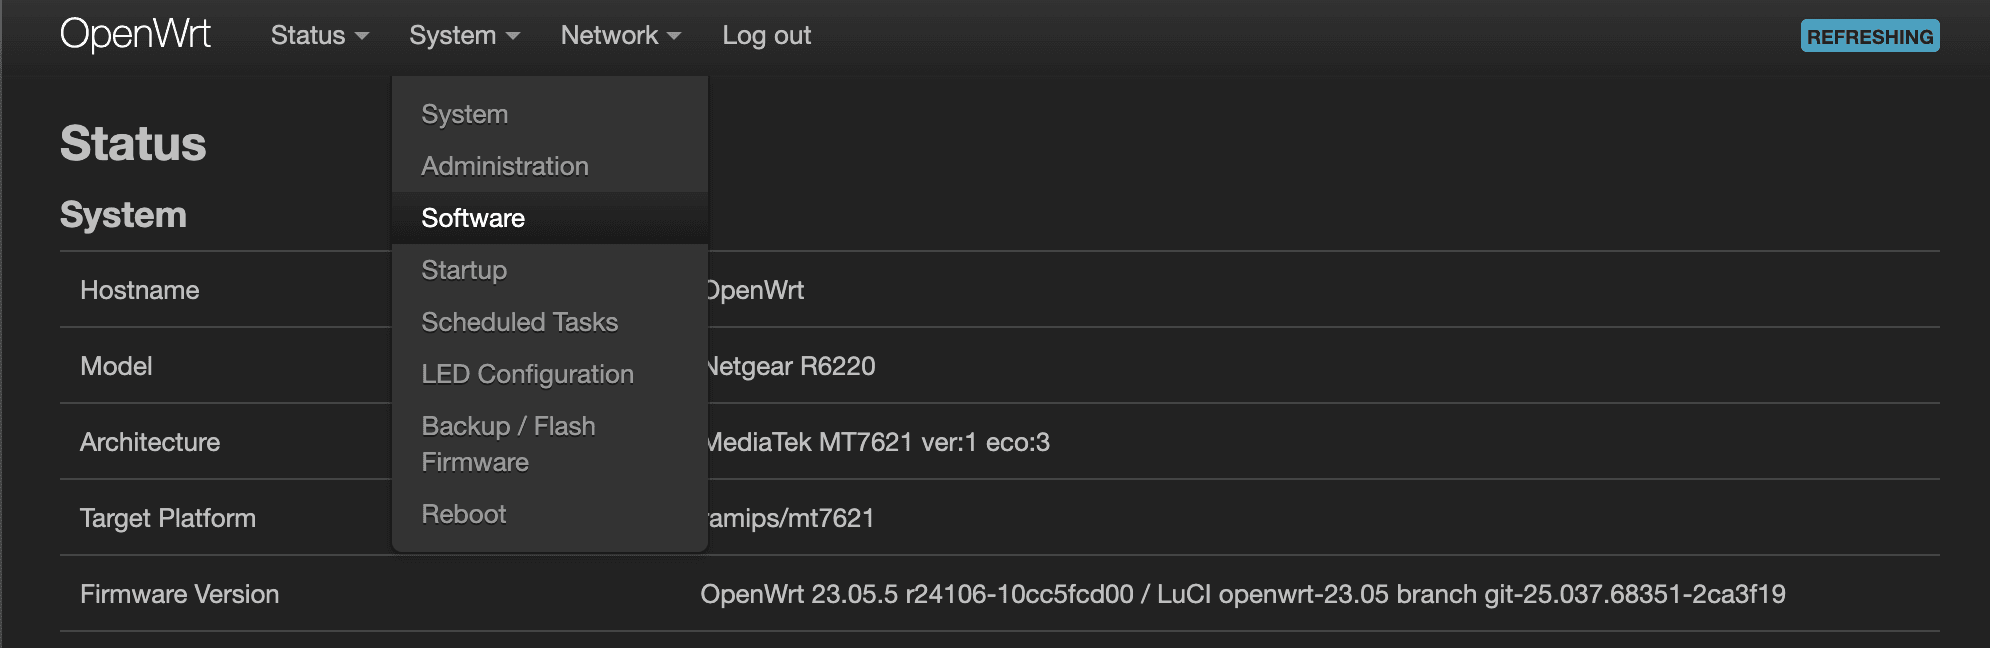
Before getting started, let's make sure our baseline software is up-to-date. Go over to System > Software.
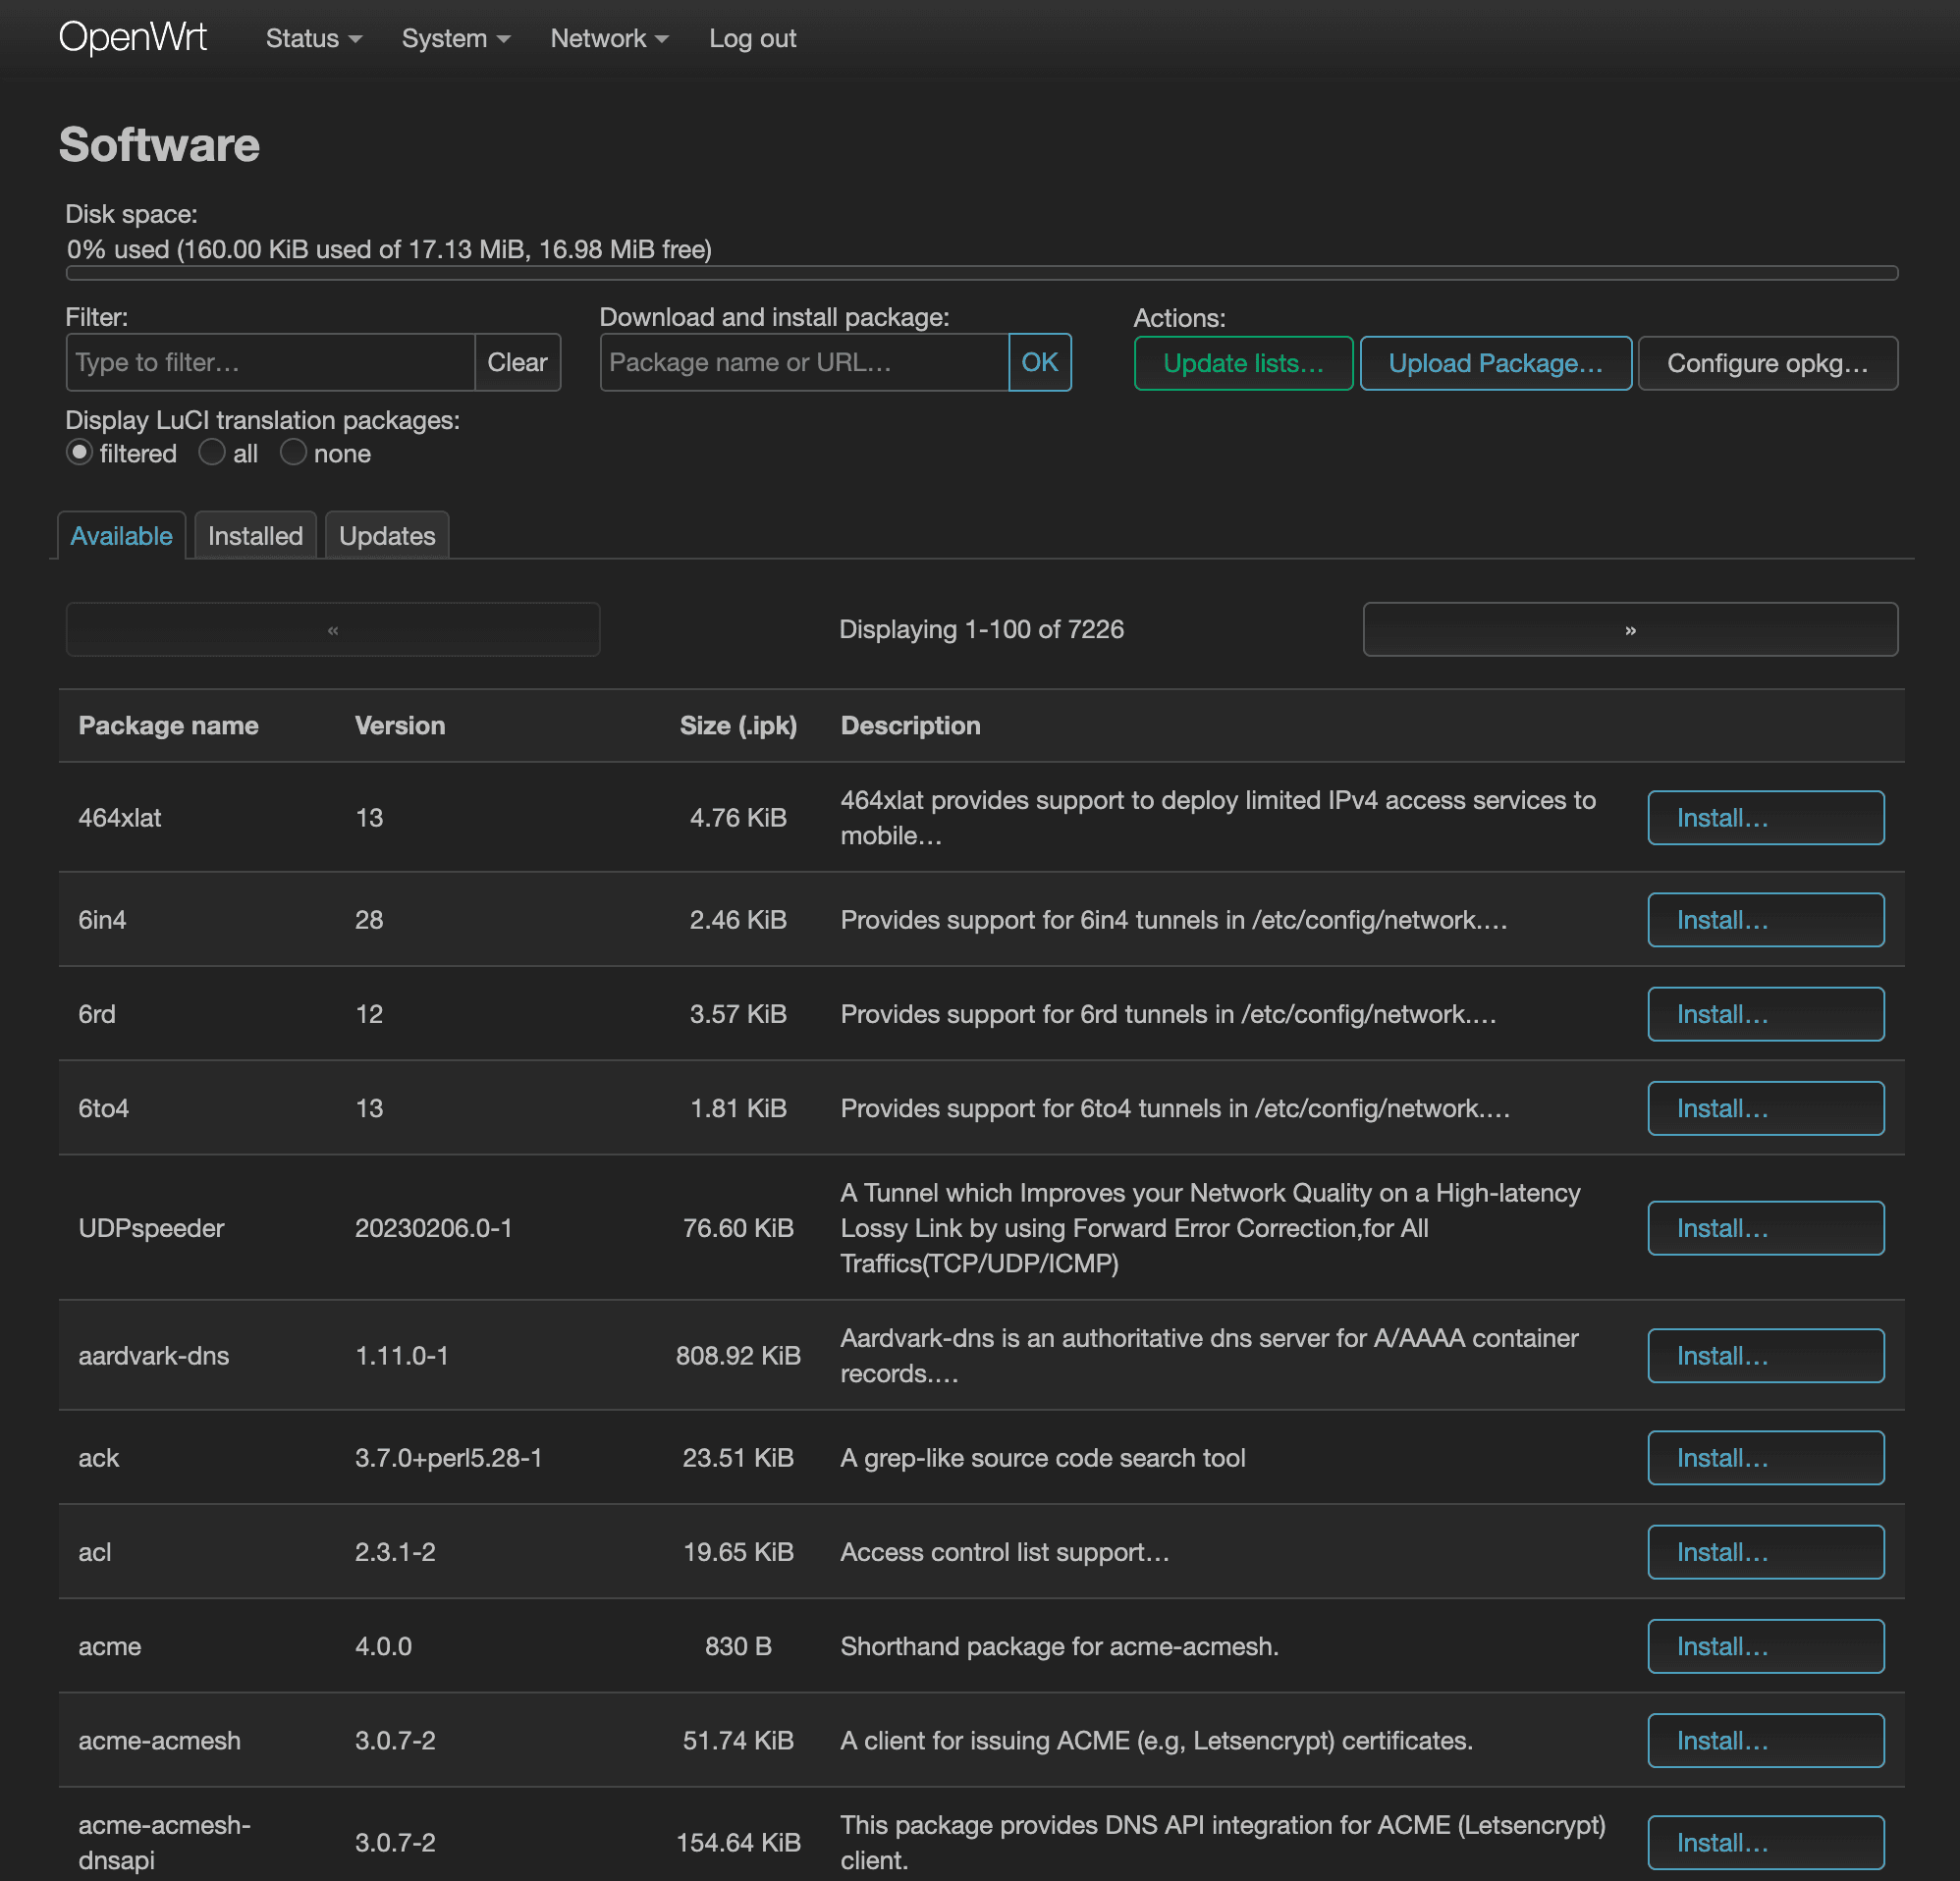
If this is a brand-new installation, you may see that there is, “No information available”. We'll have to click, “Update lists…”. This won't actually update any software; it'll only refresh the local package information and their versions on your system.

Once you update the list, you should now see many more packages listed under the “Available” tab.
If you switch over to the “Updates” tab, you may see that some of your packages are outdated and may require you to update them. Before installing any new software, let's make sure the currently installed packages are up-to-date.

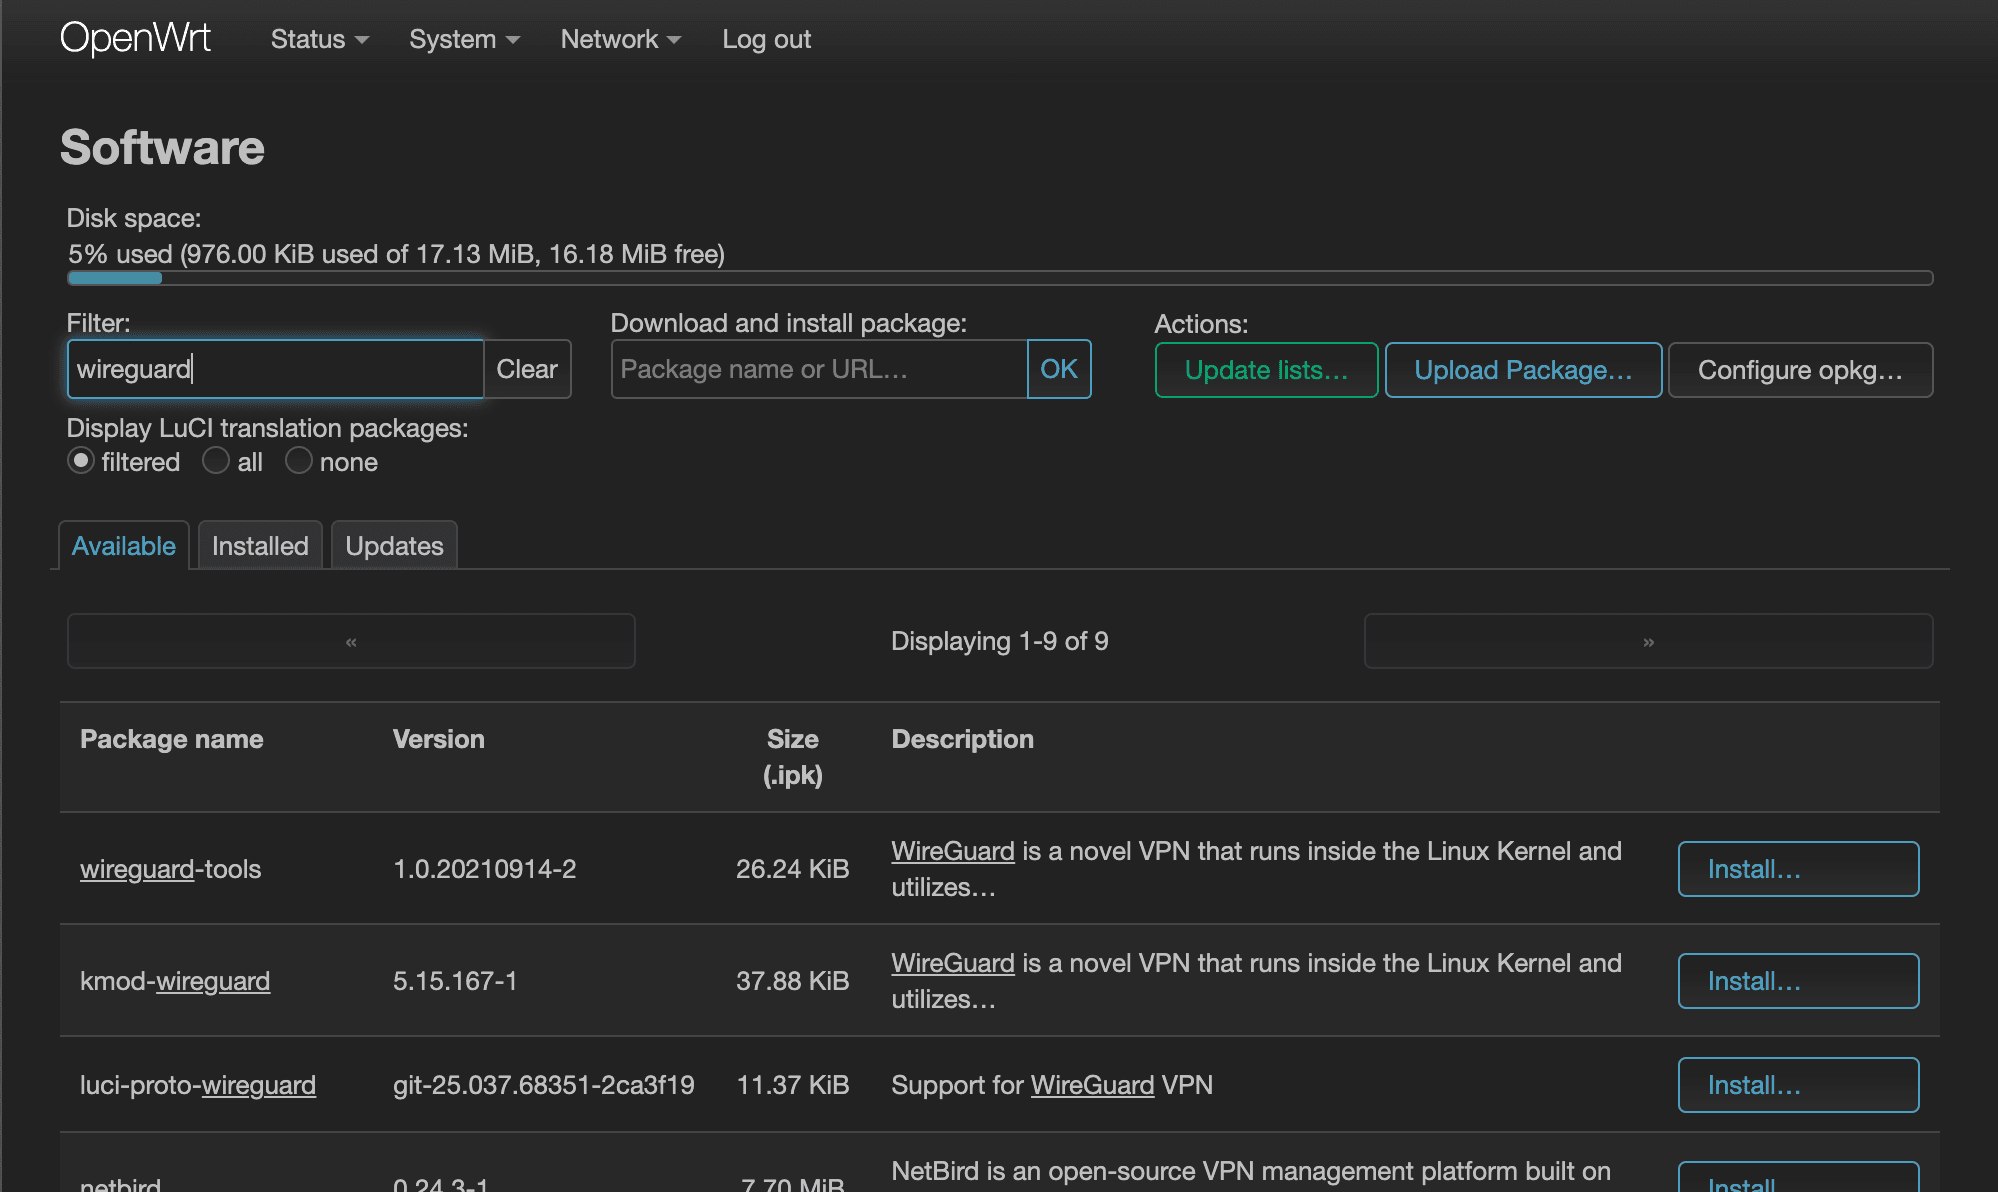
Now it's time to install WireGuard. Go back over to the, “Available” tab and search for “wireguard” in the Filter field. Install wireguard-tools, kmod-wireguard, and luci-proto-wireguard packages.
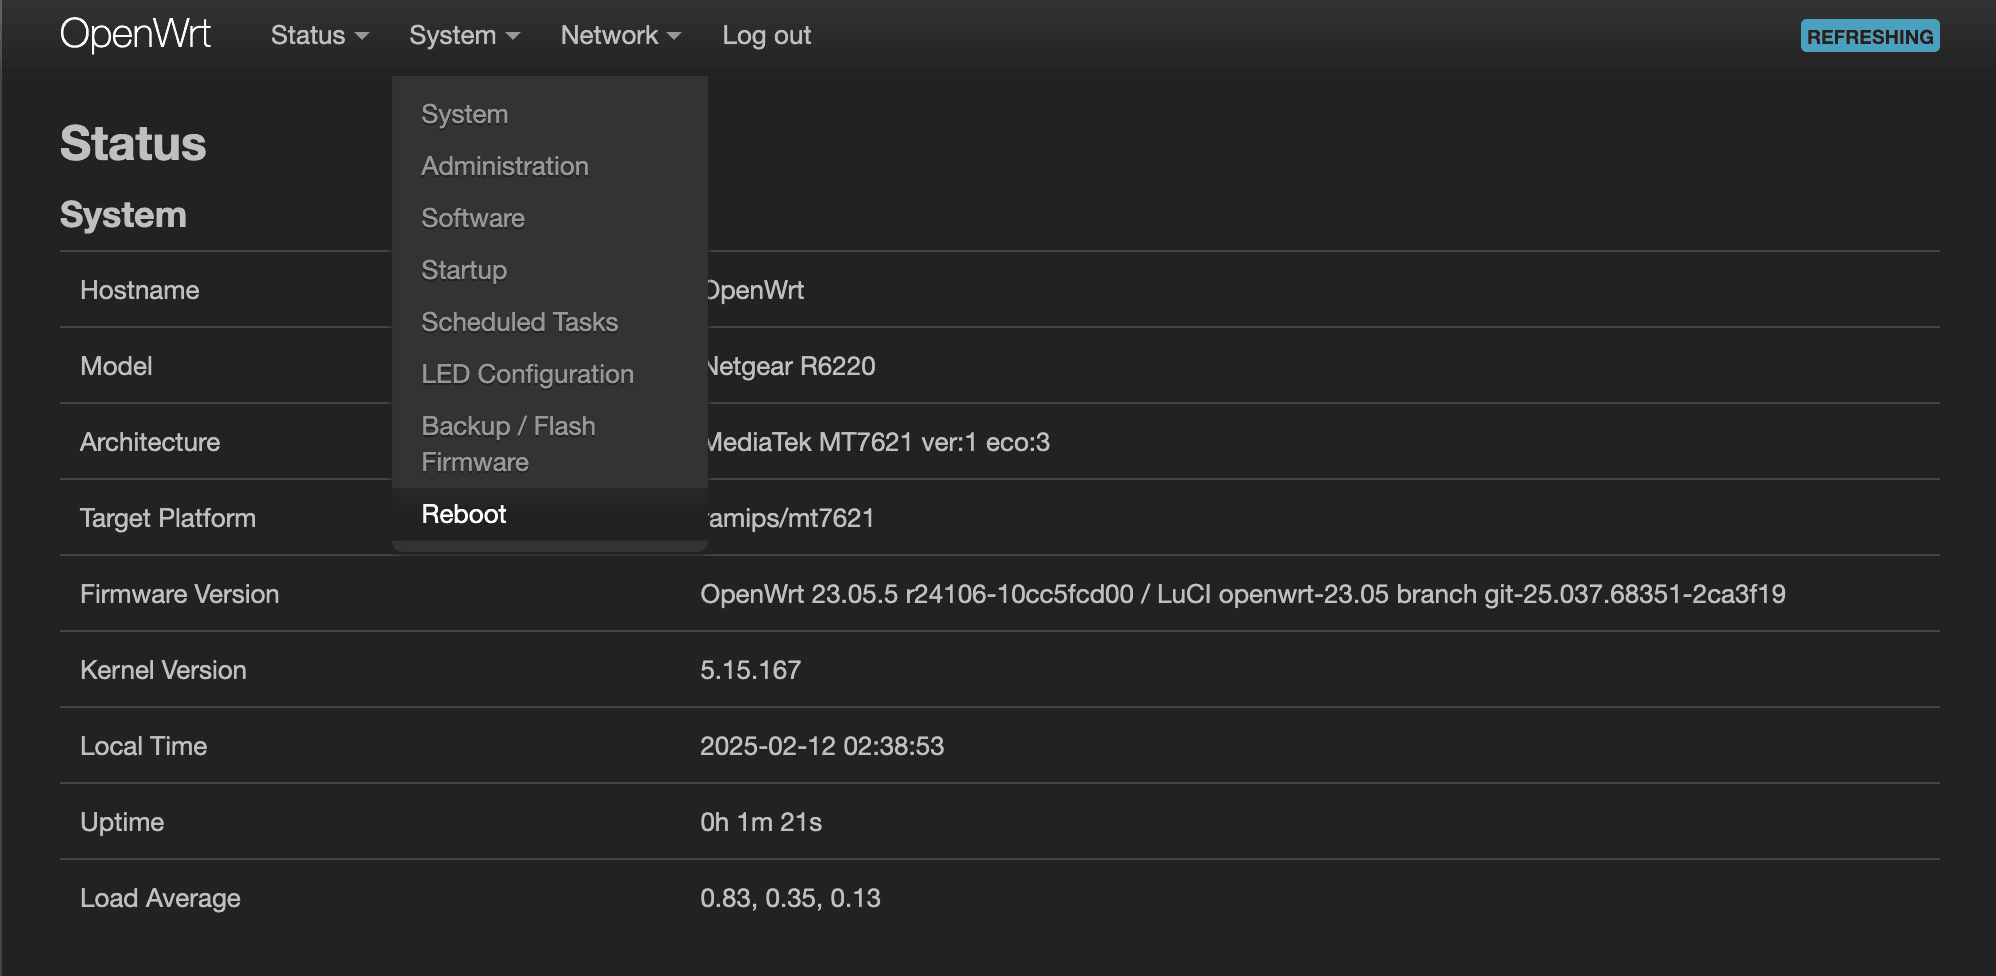
Once everything is installed, select System > Reboot to reboot the router.
Create an Interface
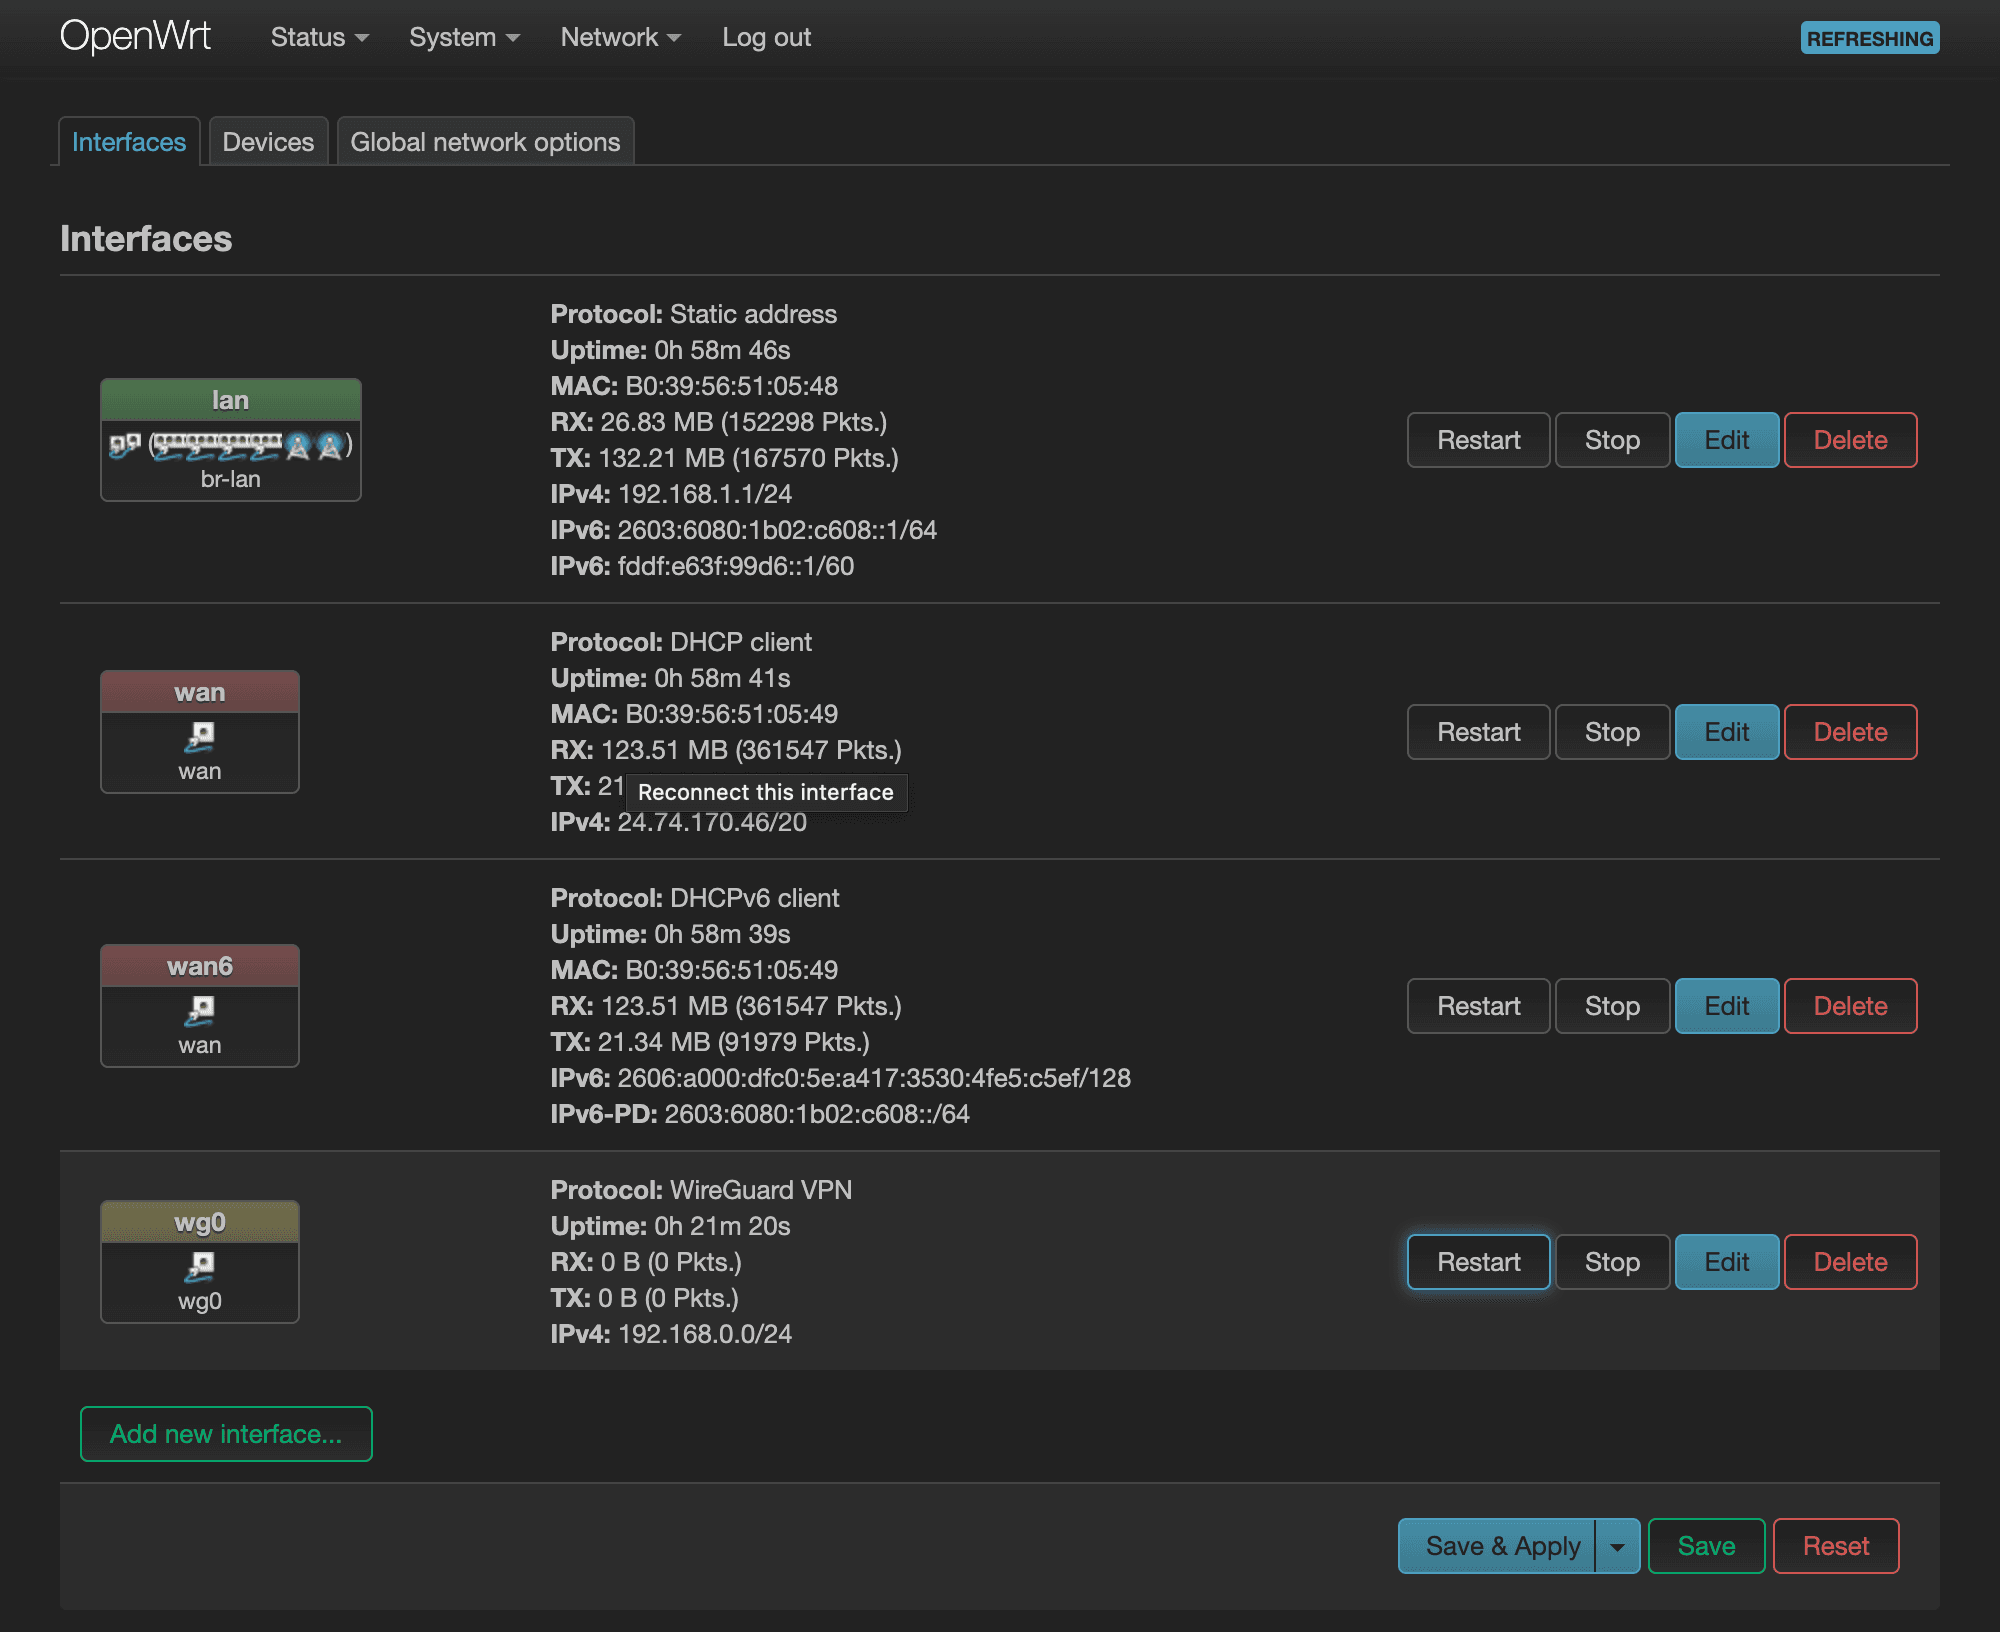
Once you've rebooted and have logged back in, it's now time to create a WireGuard interface. Navigate to Network > Interfaces and click on, “Add new interface…” to bring up the “Add new interface…” modal window. Give this interface a name, such as “wg0”, and select “WireGuard VPN” in the Protocol dropdown. Once you're done, click “Create interface.”

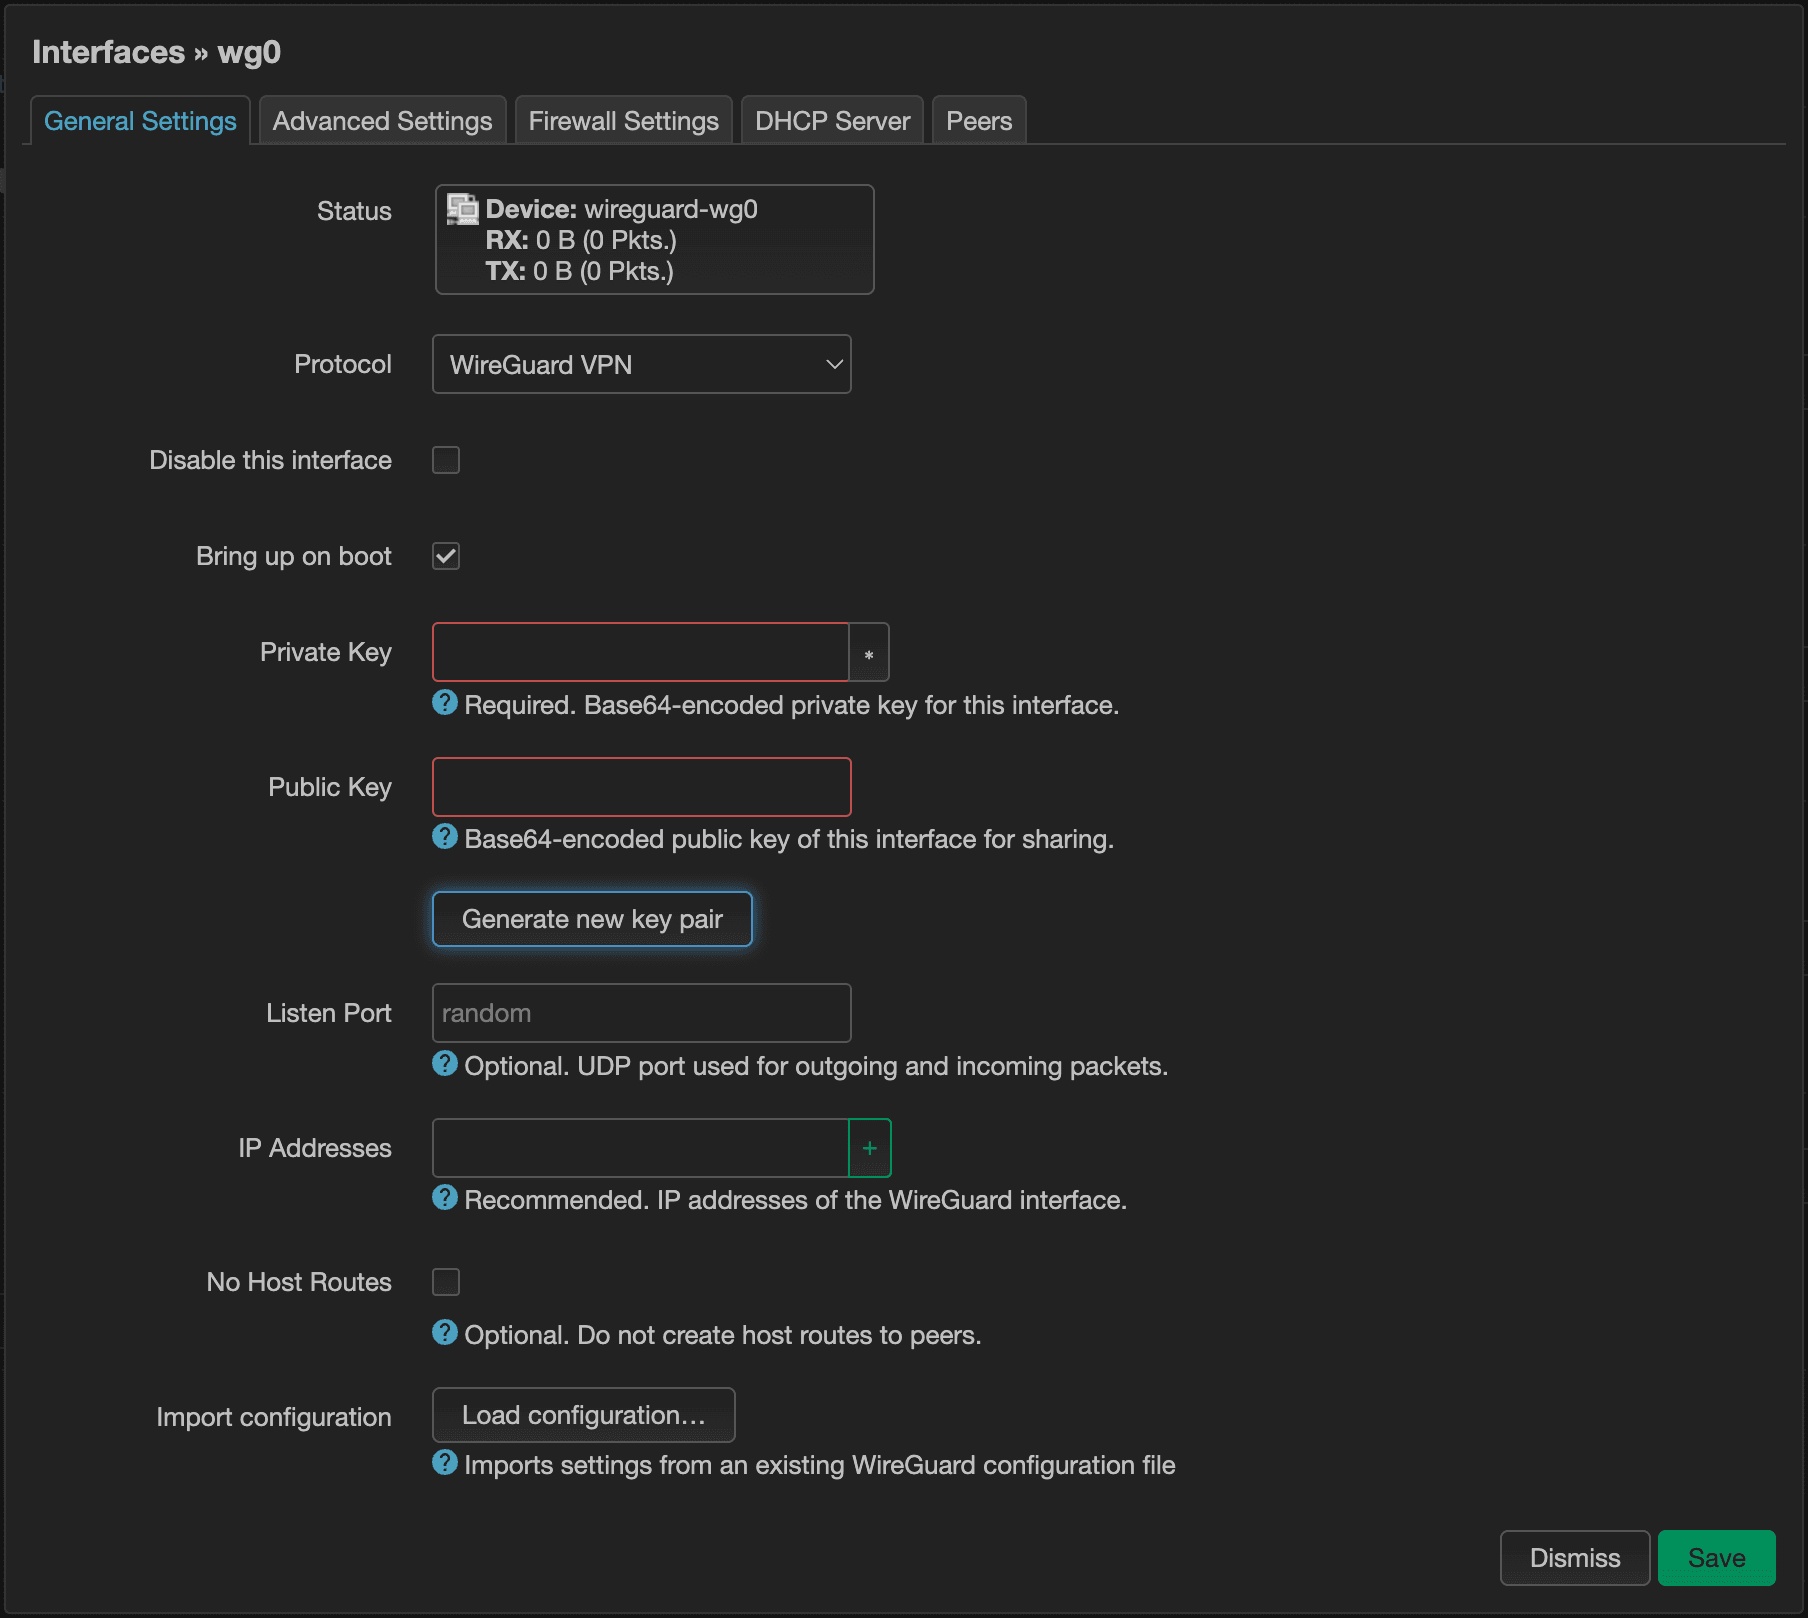
That should bring up another modal window to complete the creating of this interface. We'll have to generate the Private Key and Public Key by clicking on the, “Generate new key pair” button.
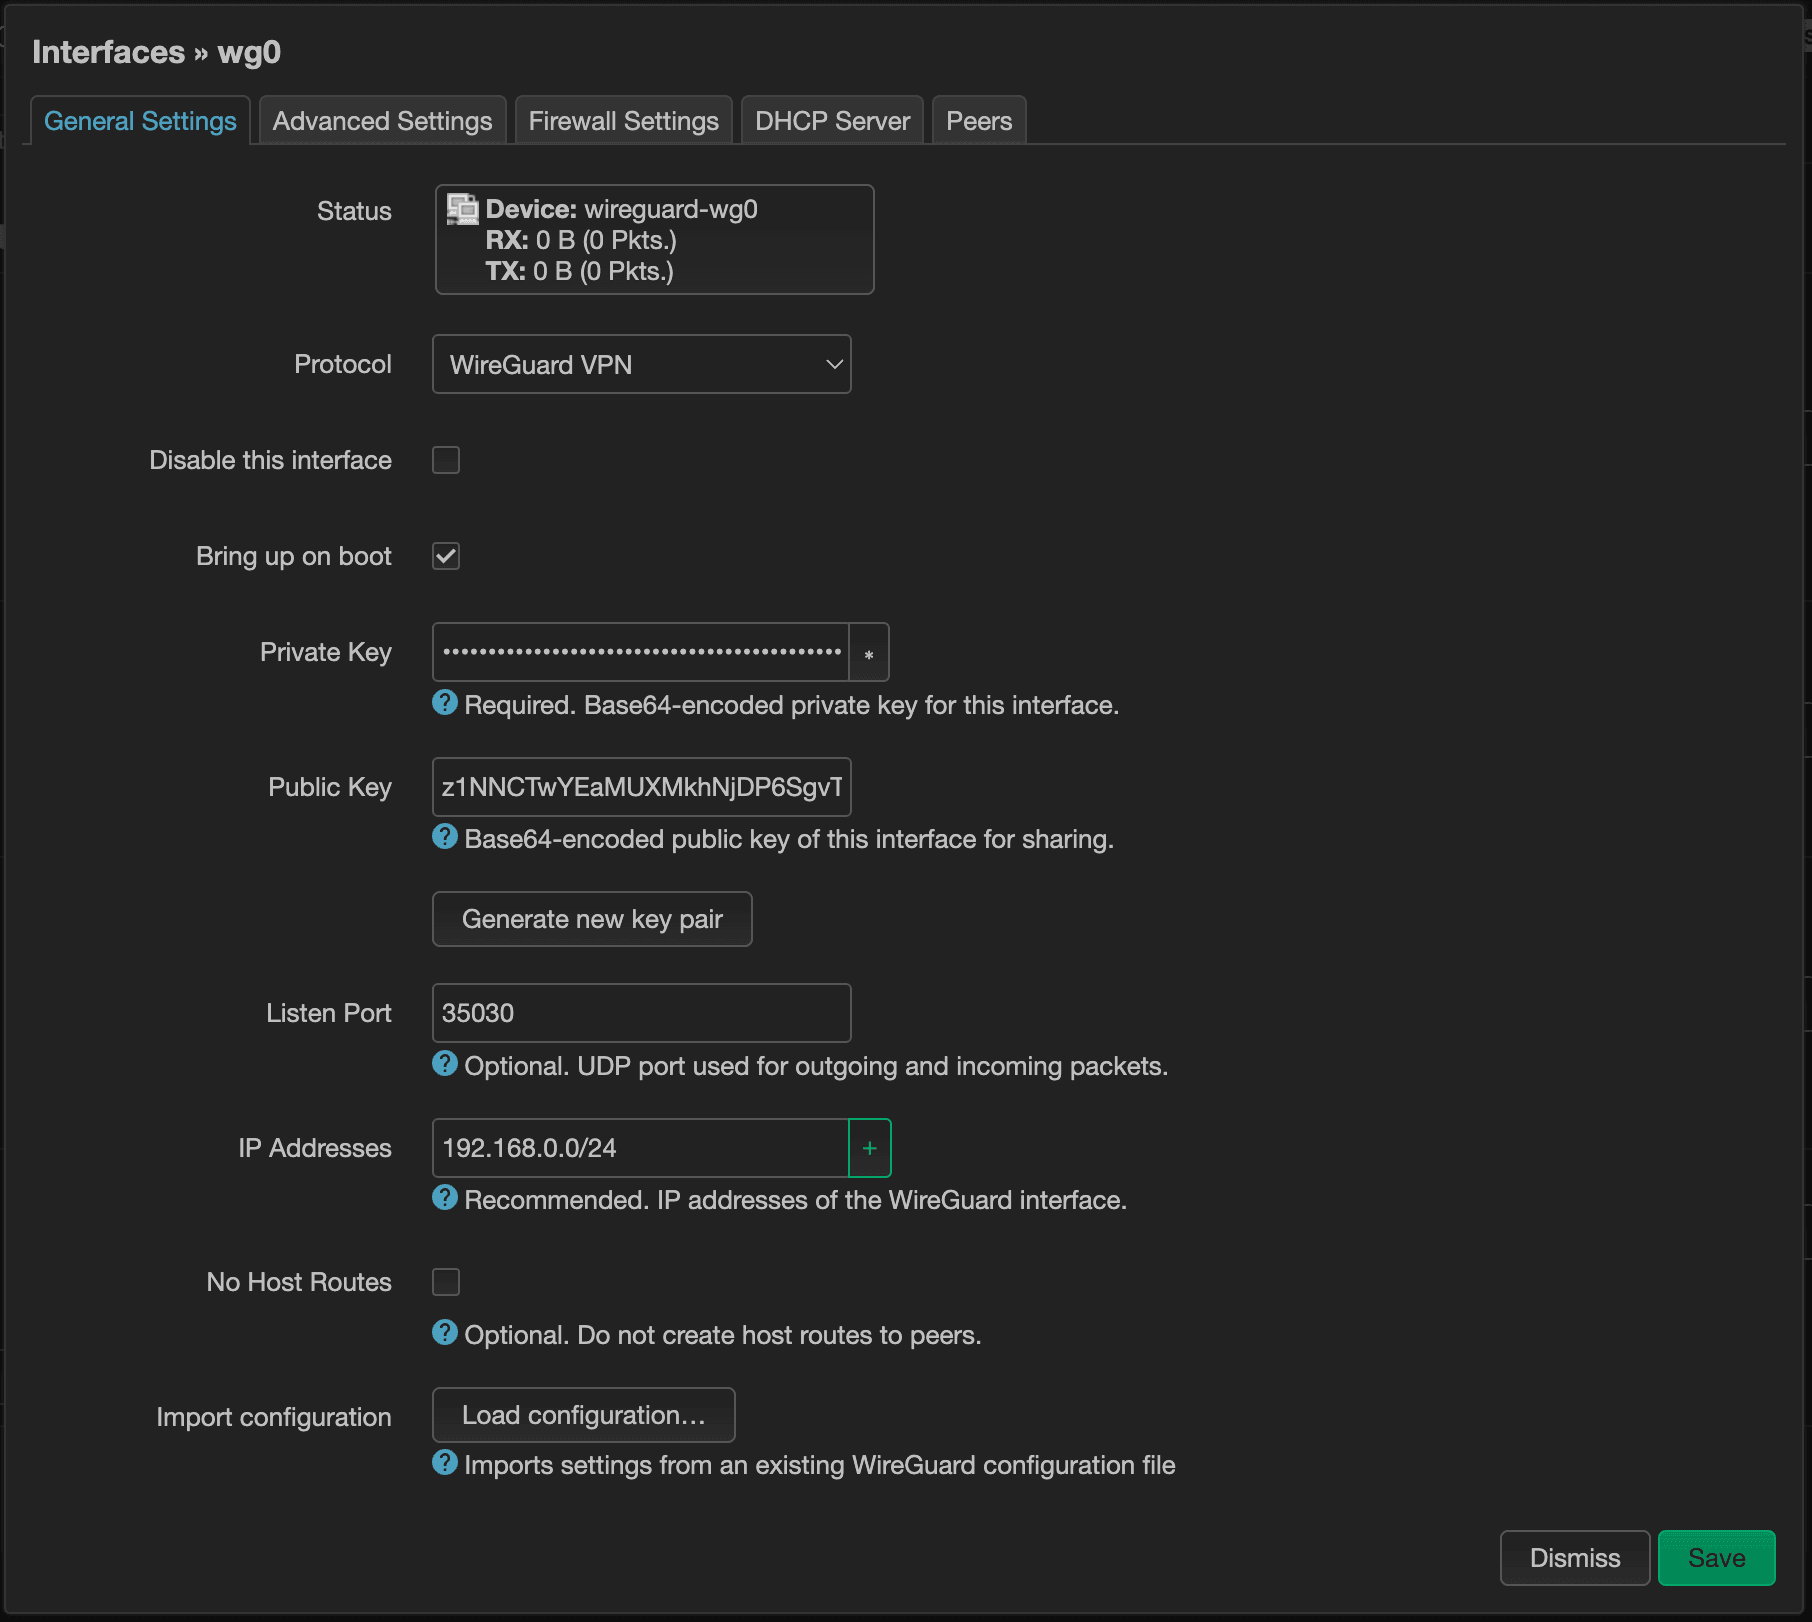
Next, let's assign a port. It says that it's not required, but it'll be good to. That way, we'll be able to configure port forwarding. Also, let's assign an IP address range. We don't want it to collide with our internal DHCP IP addresses, which is likely going to follow the 192.168.1.xxx pattern. So 192.168.0.xxx is what I've opted for here.
If you later configure your devices to have static IP addresses, this pattern makes it easier to track your devices if you can keep the last octet of your WireGuard IP addresses the same as its corresponding internal DHCP addresses. For instance, I might want my cell phone to have an internal IP address of 192.168.1.110 when it's connected to my home network and use 192.168.0.110 when I'm connected over VPN.
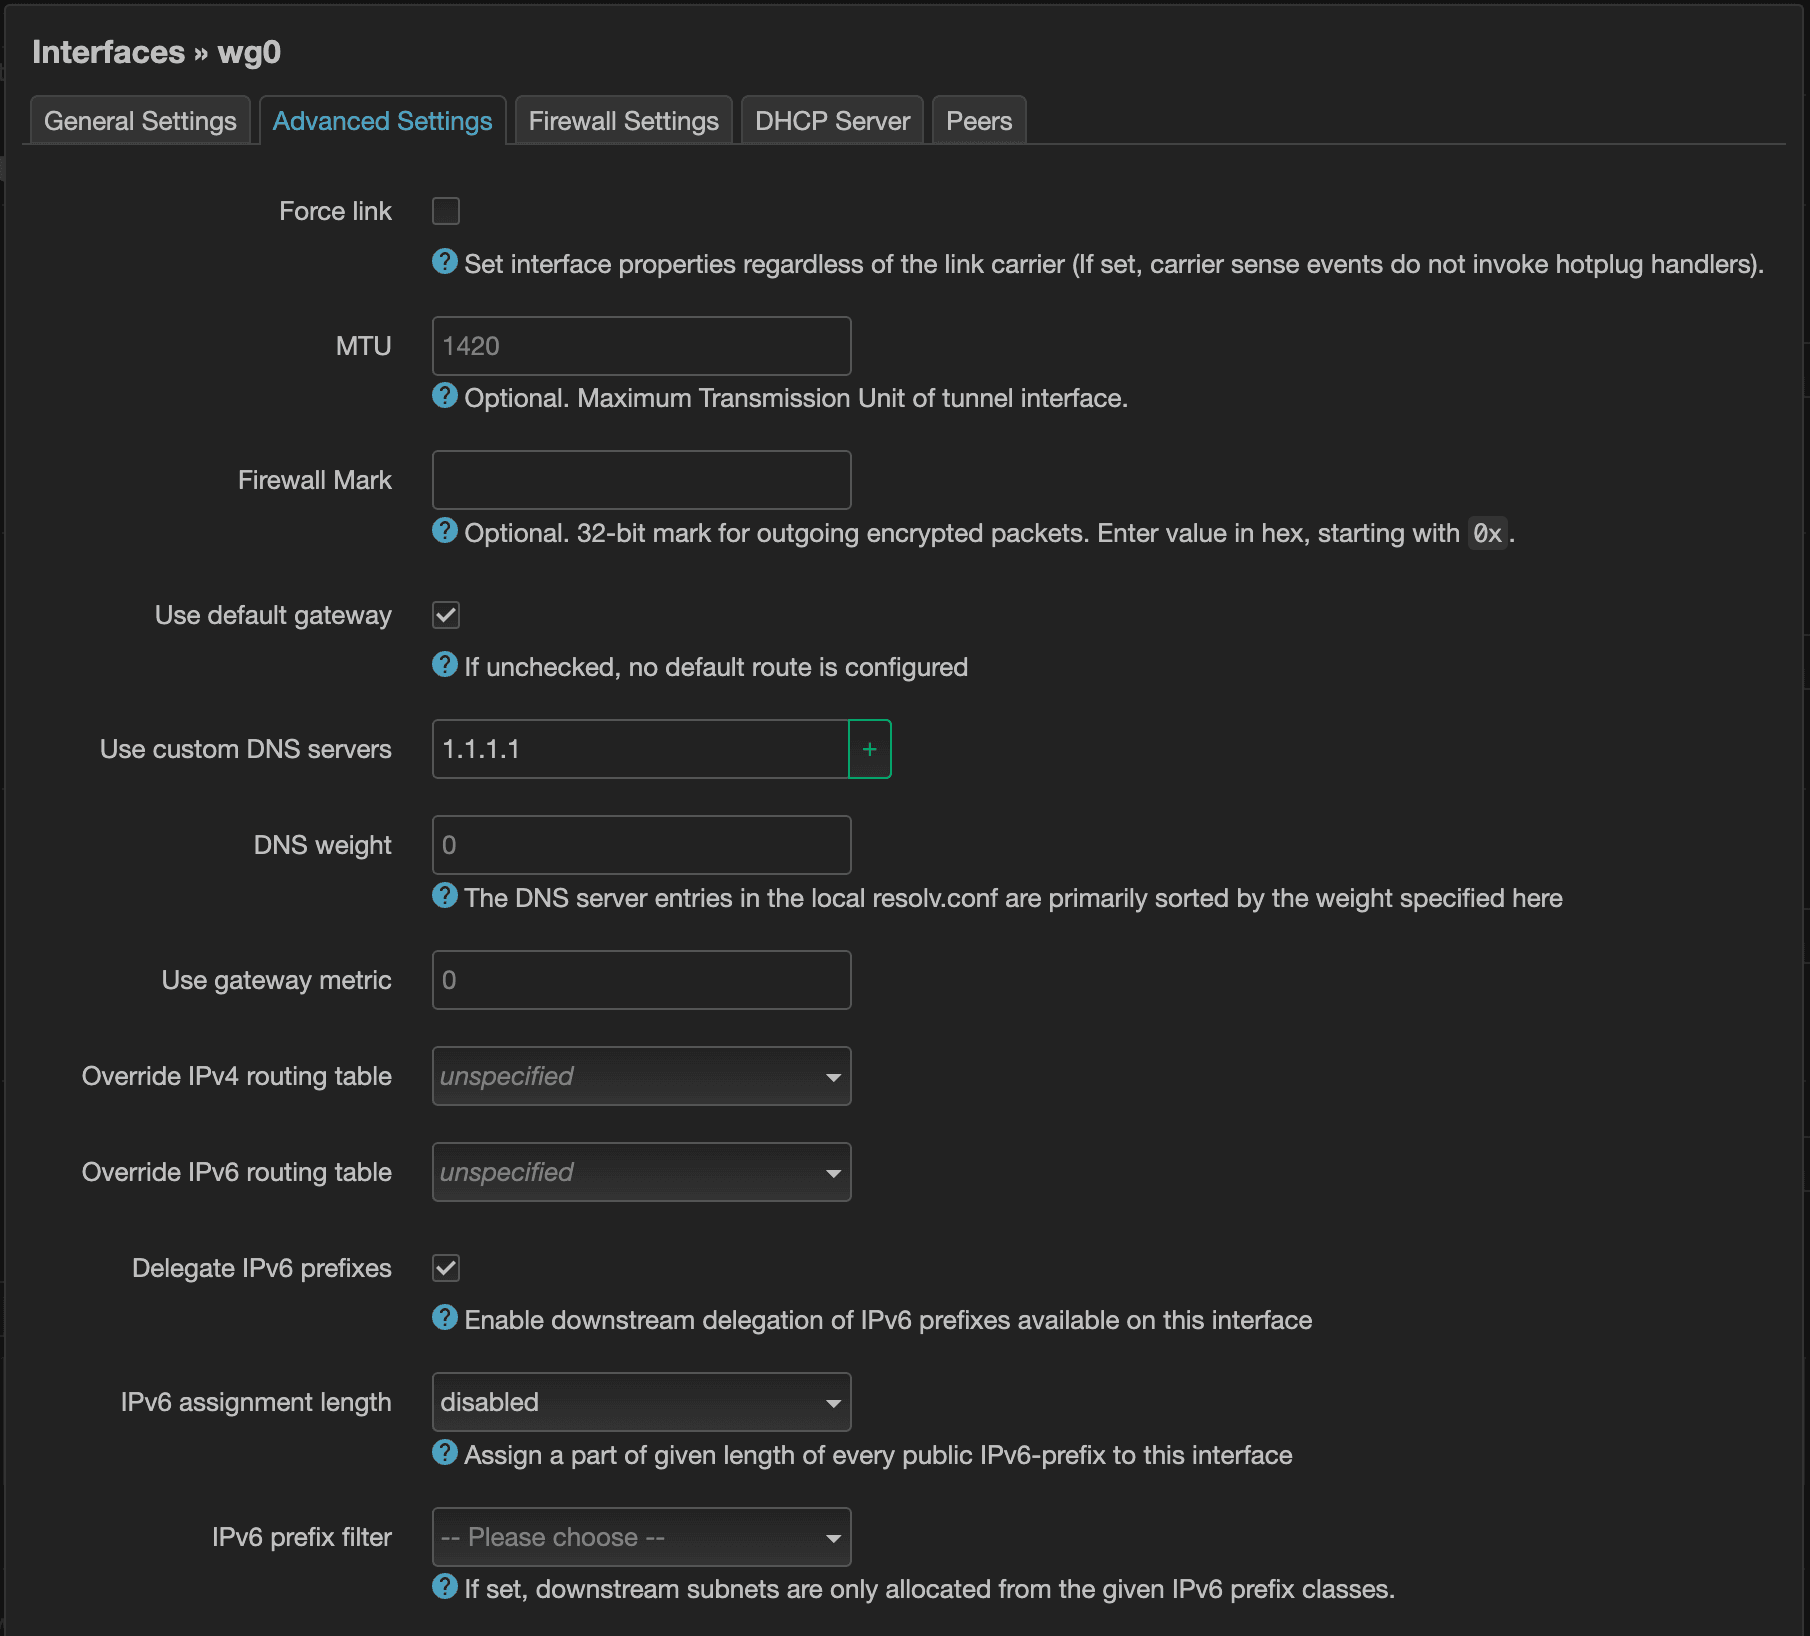
Next, switch over to the “Advanced Settings” tab. The only thing I'm interested in here is the Use custom DNS servers value. If you have an internal ad-blocking software, such as Pi-hole or AdGuard, this would be a great place to set it. Even if you don't use an ad-blocking software, I highly recommend having your own internal DNS server. And if you have one, this would be where you would enter its IP address.
Press Save to save & close the modal and press Save & Apply to persist the changes.
Firewall
Navigate to Network > Firewall to configure the firewall. This will be important to allow devices to connect from outside our home network, but also to make sure that those devices have access to the Internet once connected.
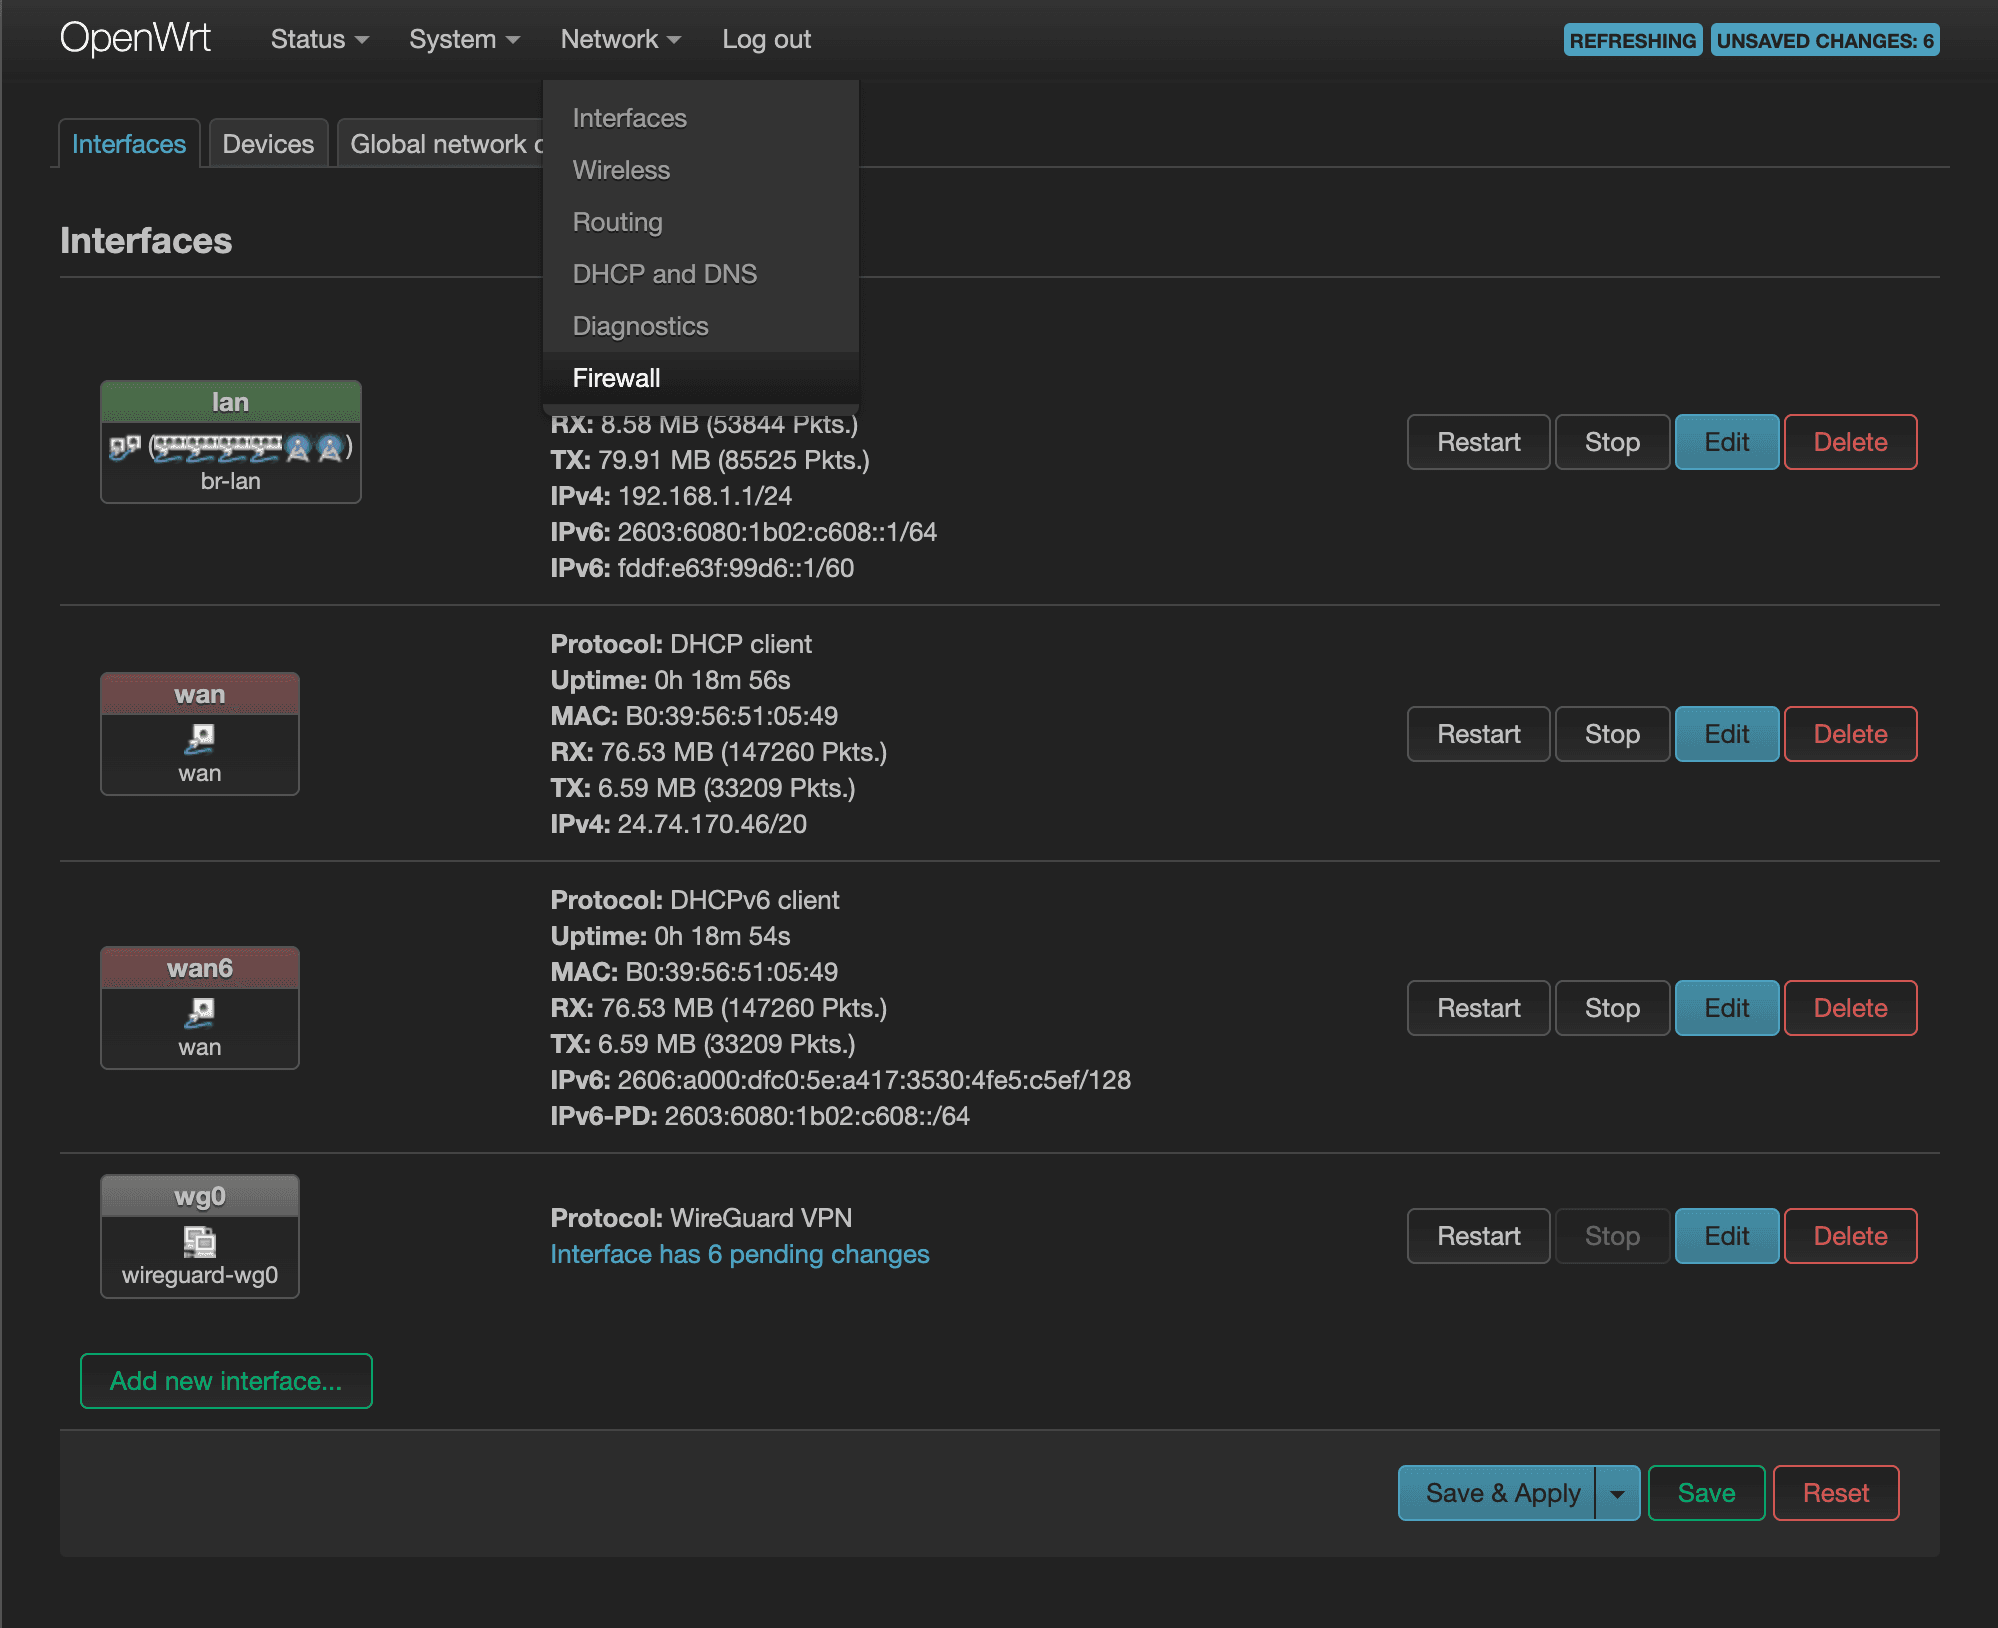
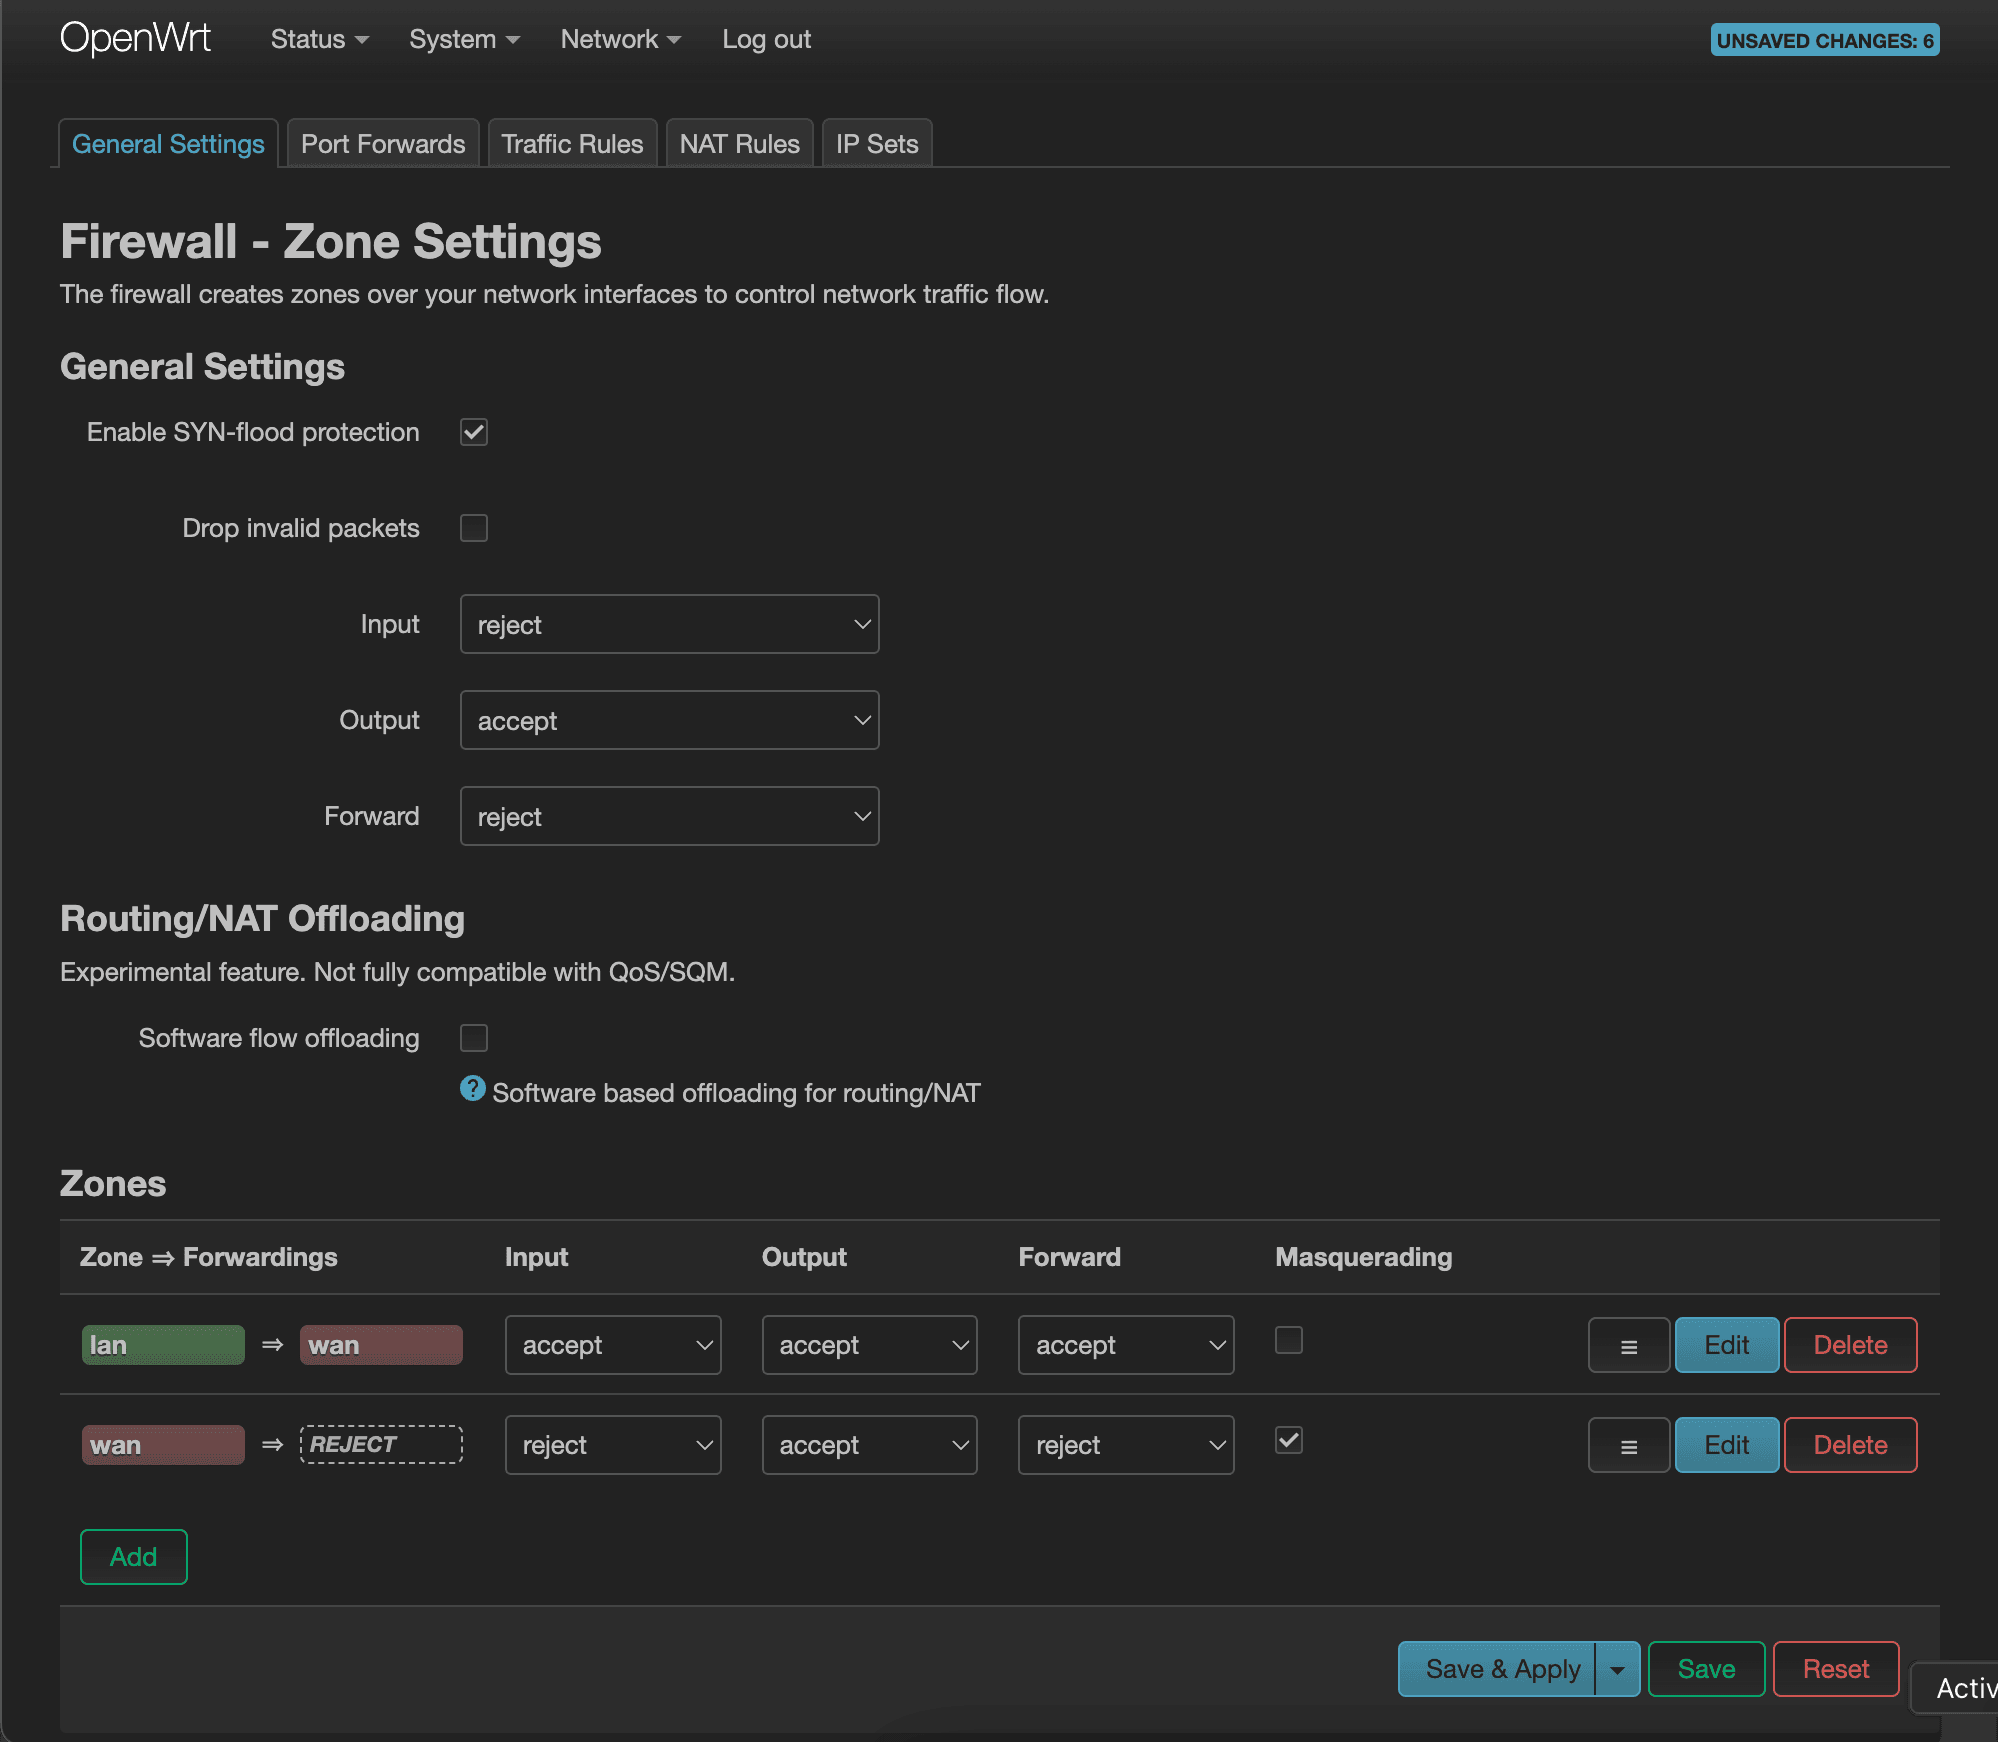
You should see your lan and wan zones listed here by default. As you may have guessed, the lan zone represents the lan interface and the wan zone represents all your wan interfaces. We'll have to add our own WireGuard zone here. Click on the “Add” to get started.
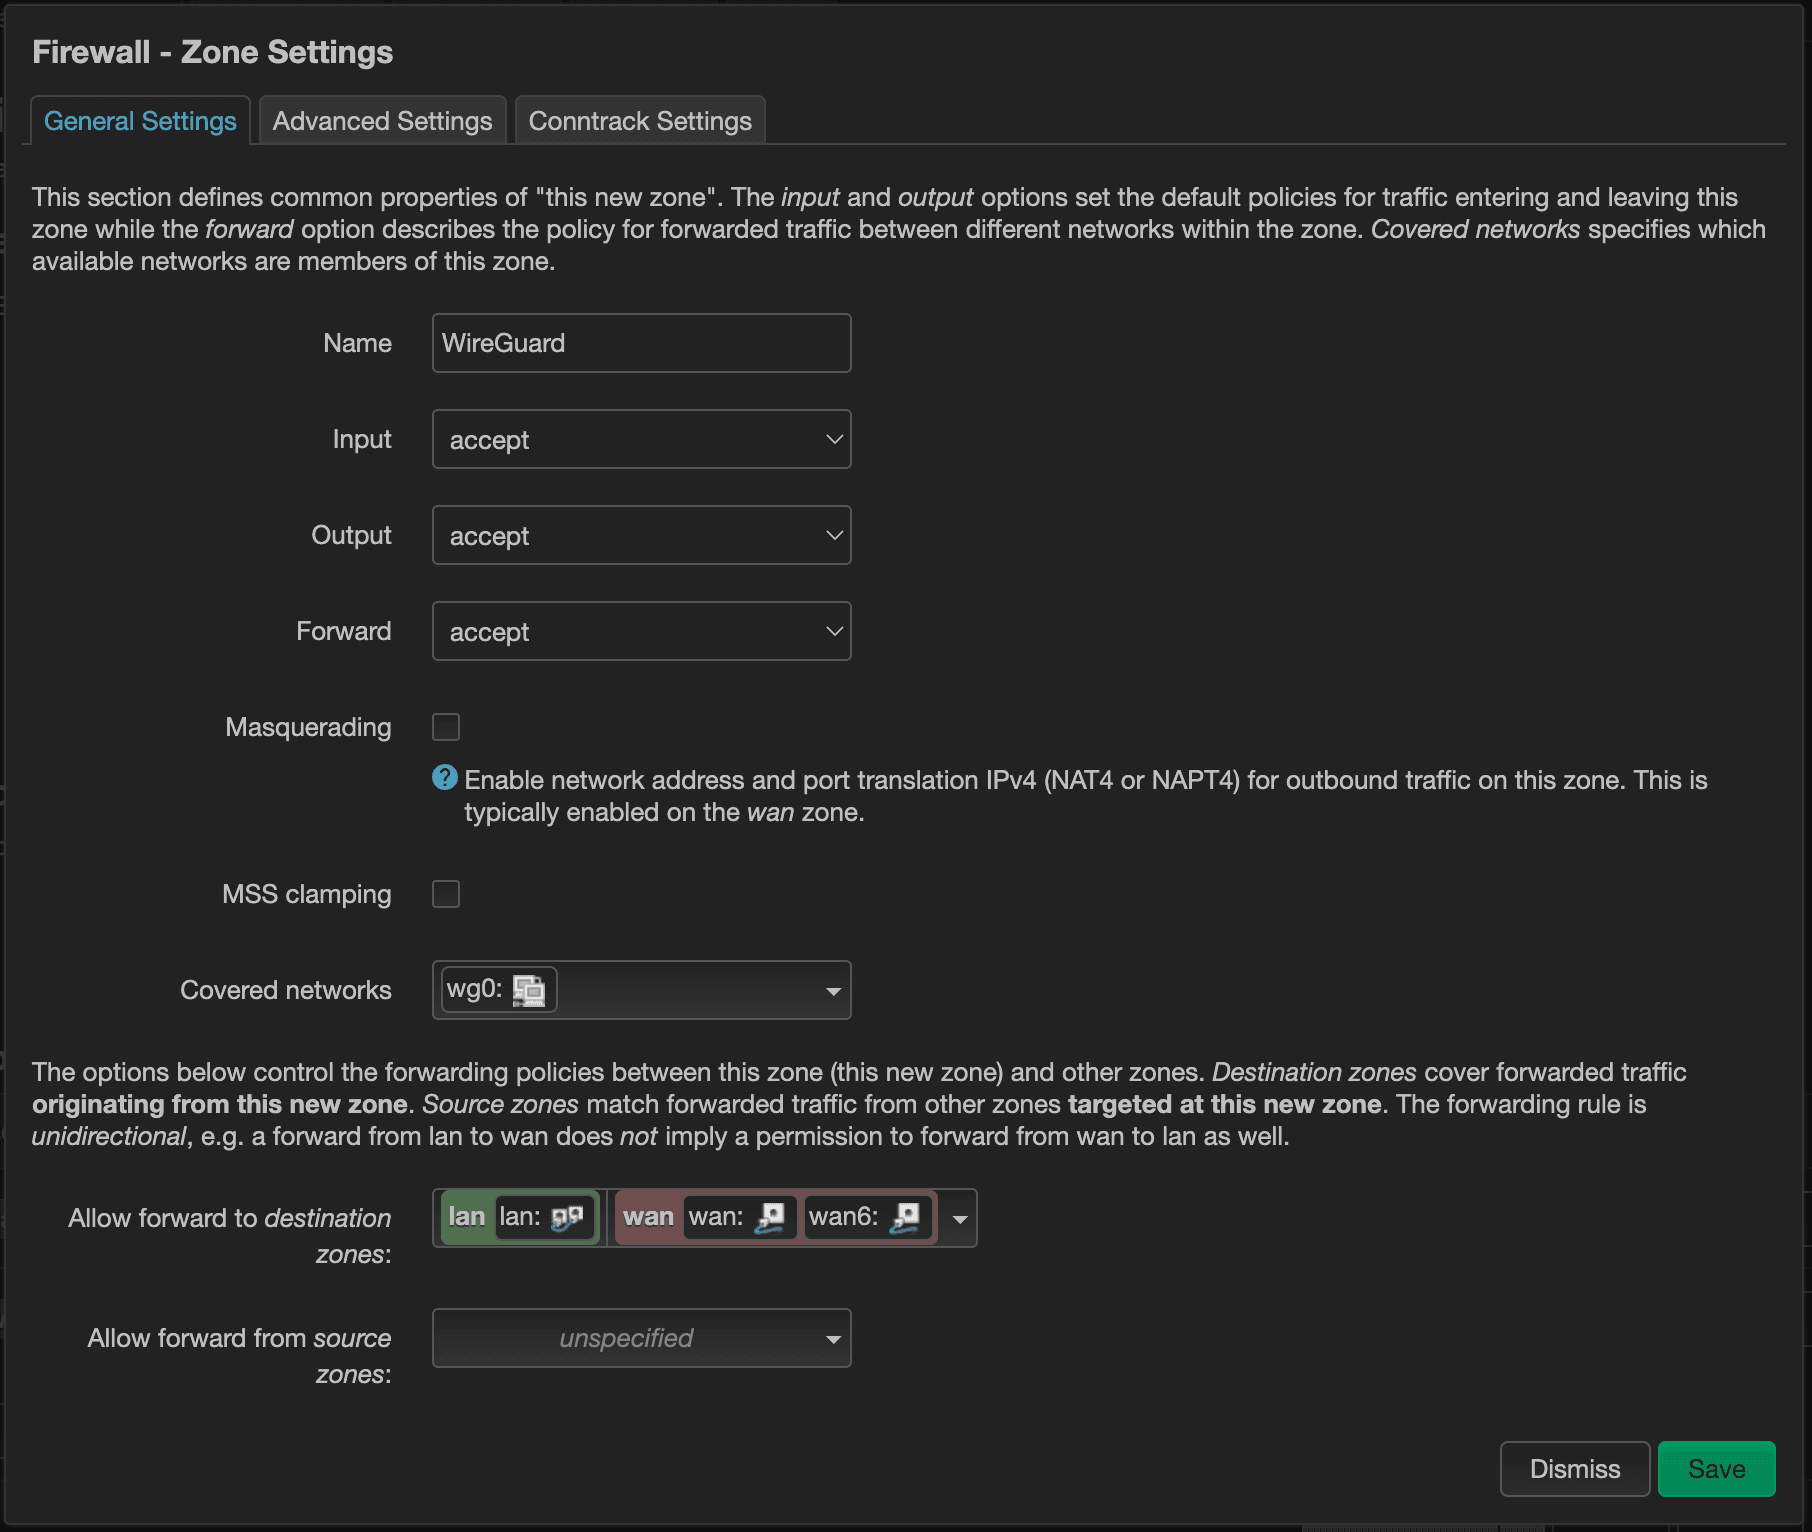
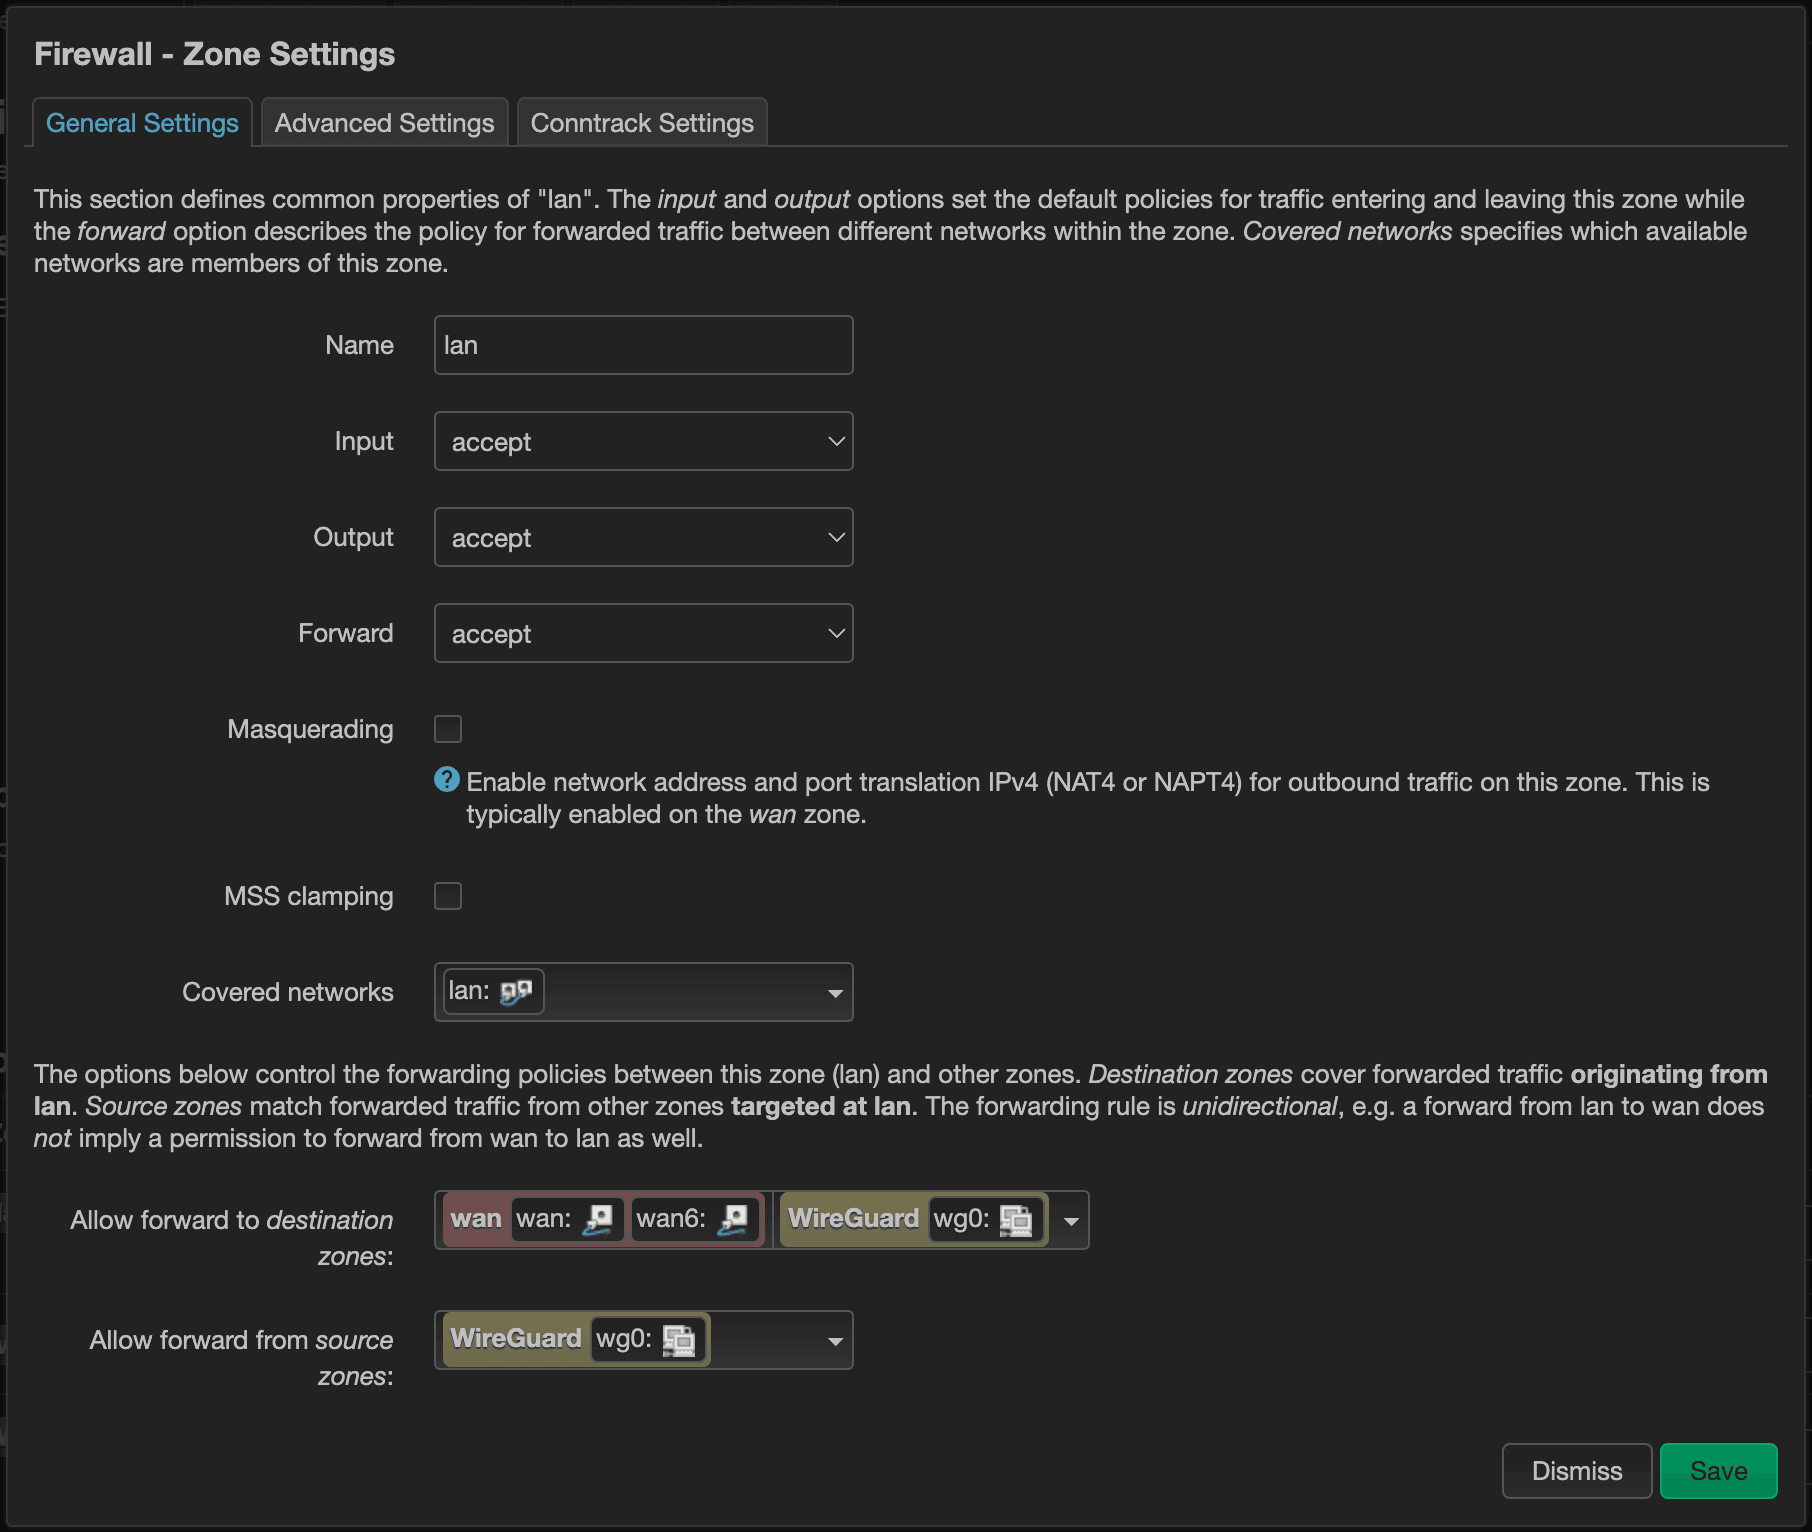
Let's give it the name “WireGuard” and set Input, Output, and Forward to all “accept”. For Covered networks, we'll select the “wg0” interface that we just created earlier. Select lan and wan zones for the “Allow forward to destination zones” setting and press “Save” to finalize creating the WireGuard zone.
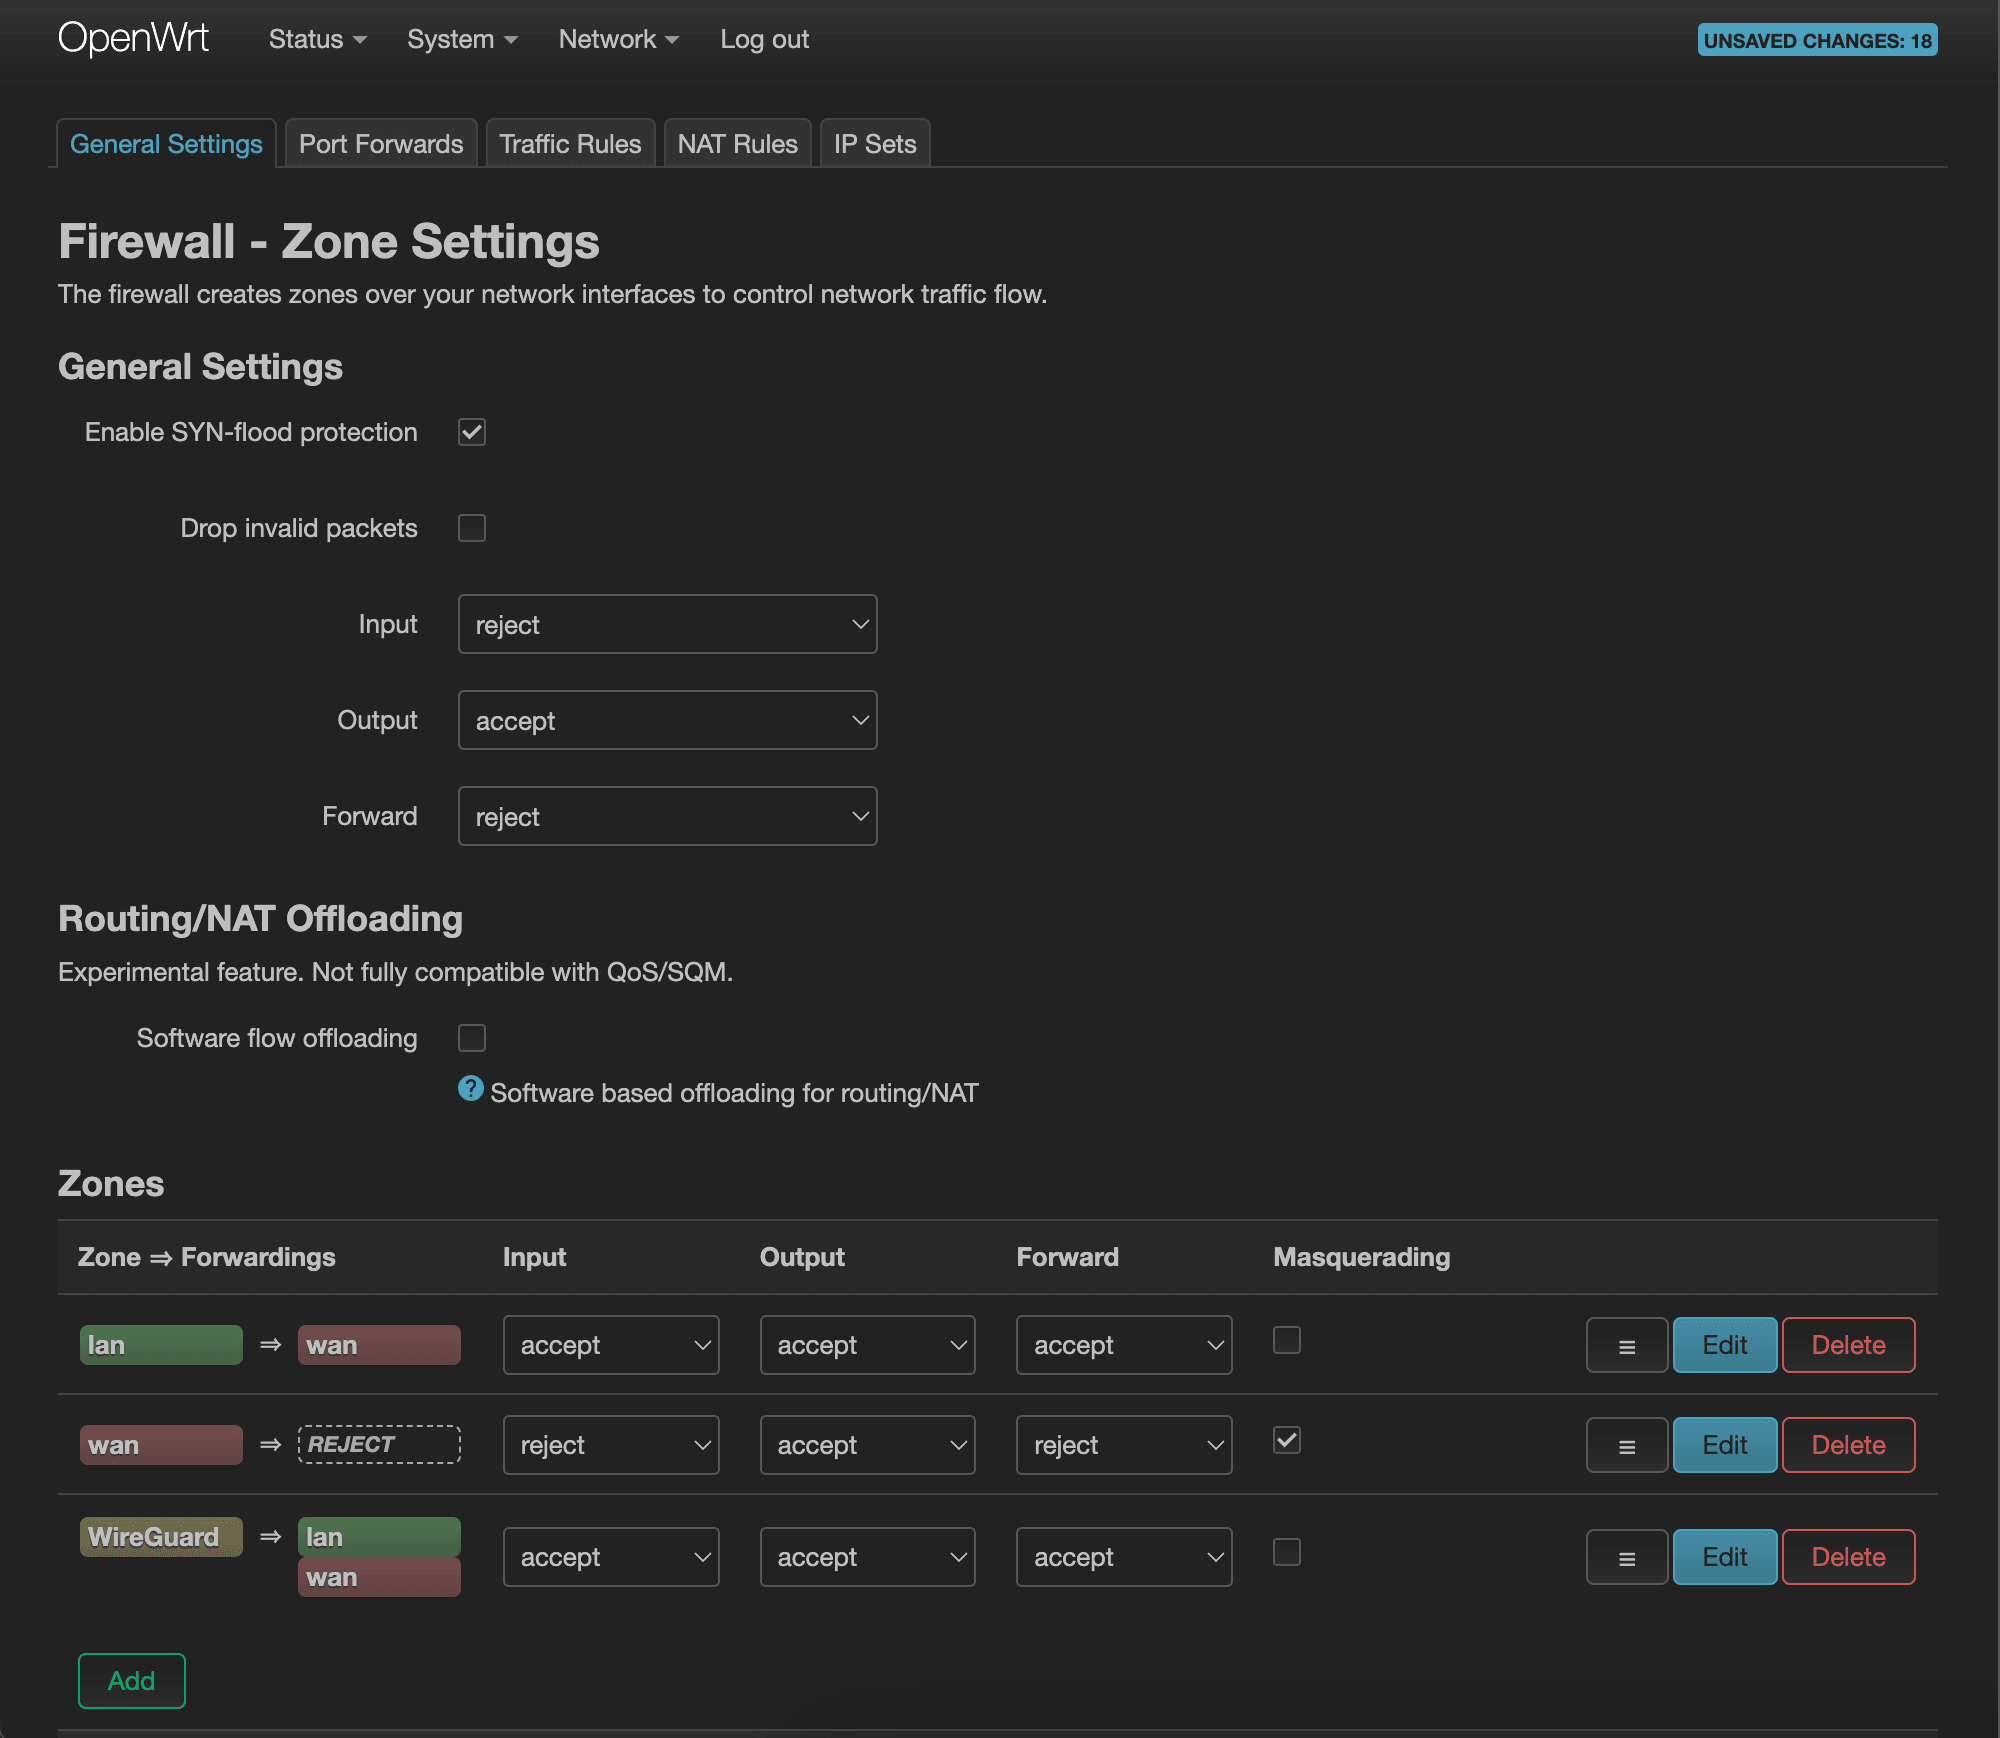
Seeing the visual representation of the traffic flow makes it clear as to what's going on. We want all the devices connected to the “wg0” interface (as represented by the WireGuard zone that we just created) to be able to hit the lan zone (to have access to internal services) and wan zone (to have access to the Internet).
You may also want to consider allowing your lan devices to have access to the devices connected to VPN. To do that, click “Edit” for the lan => wan row and add WireGuard to the Allow forward to destination zones list and press “Save”.
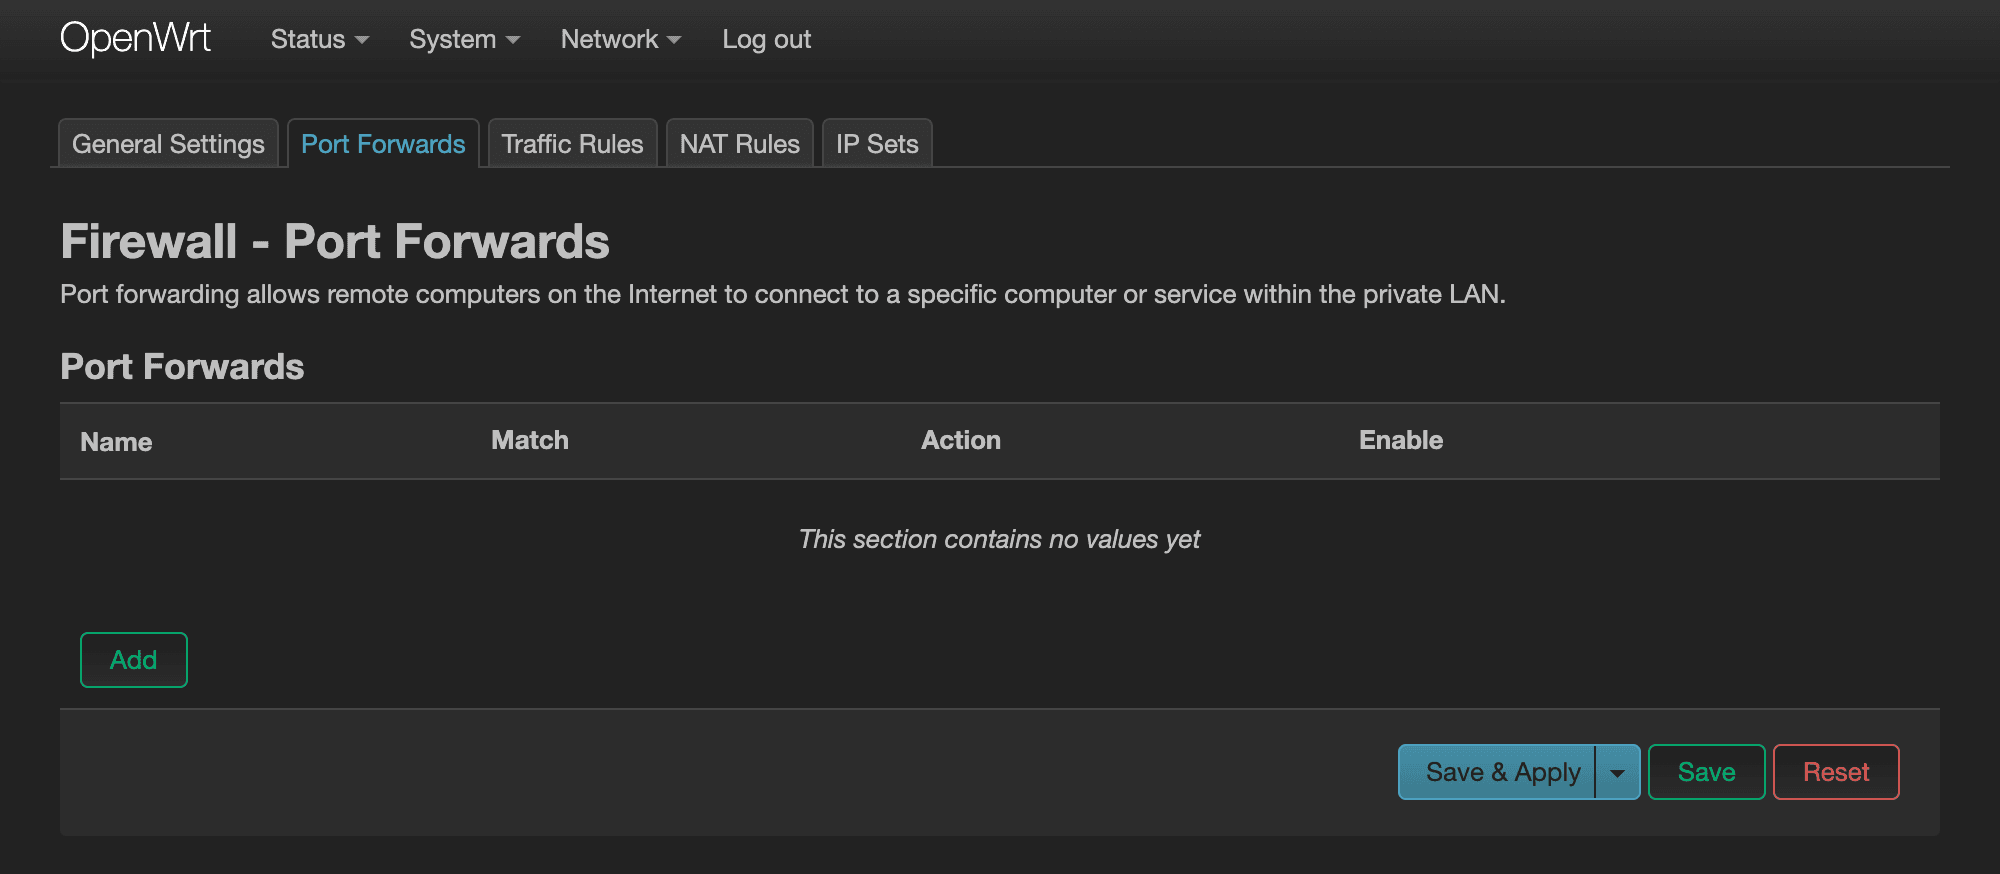
Next, let's allow our devices to be able to actually connect to the WireGuard server. Switch to the “Port Forwards” tab and click “Add”.
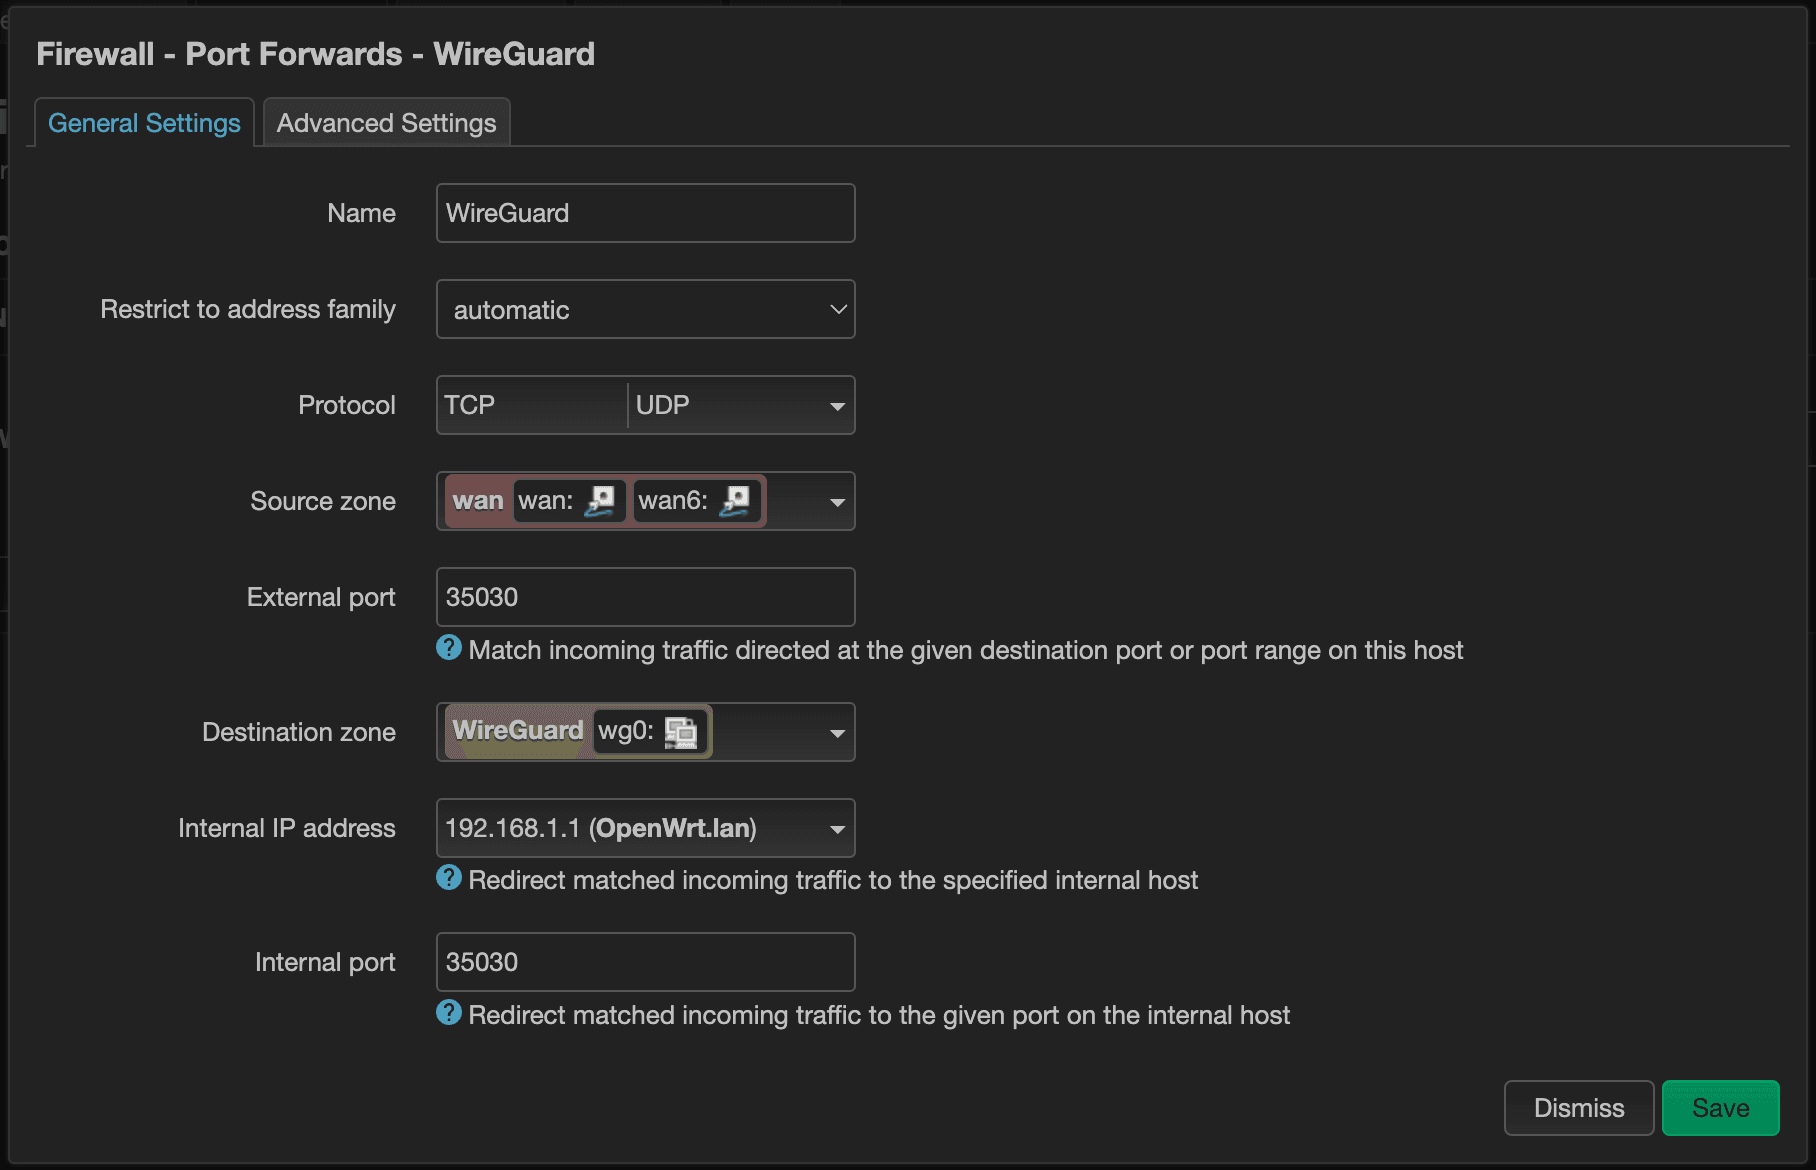
We'll call this rule the “WireGuard” rule. Select wan for the Source zone and WireGuard as the Destination zone. Both External port and Internal port will have the same port that we assigned earlier when we created the “wg0” interface, and the Internal IP address will be the router's IP address, since that's where our WireGuard server is running.
Adding Peers
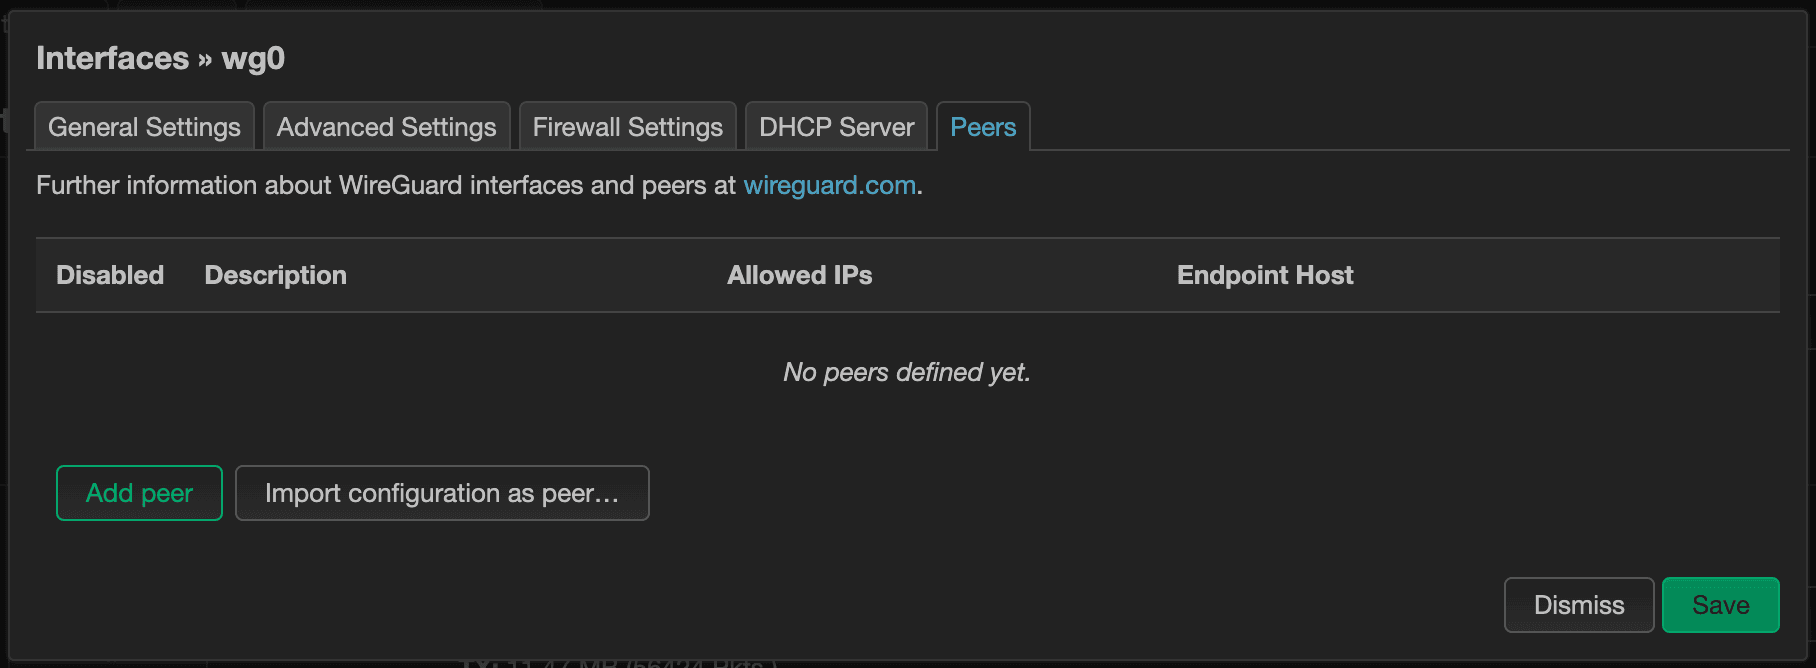
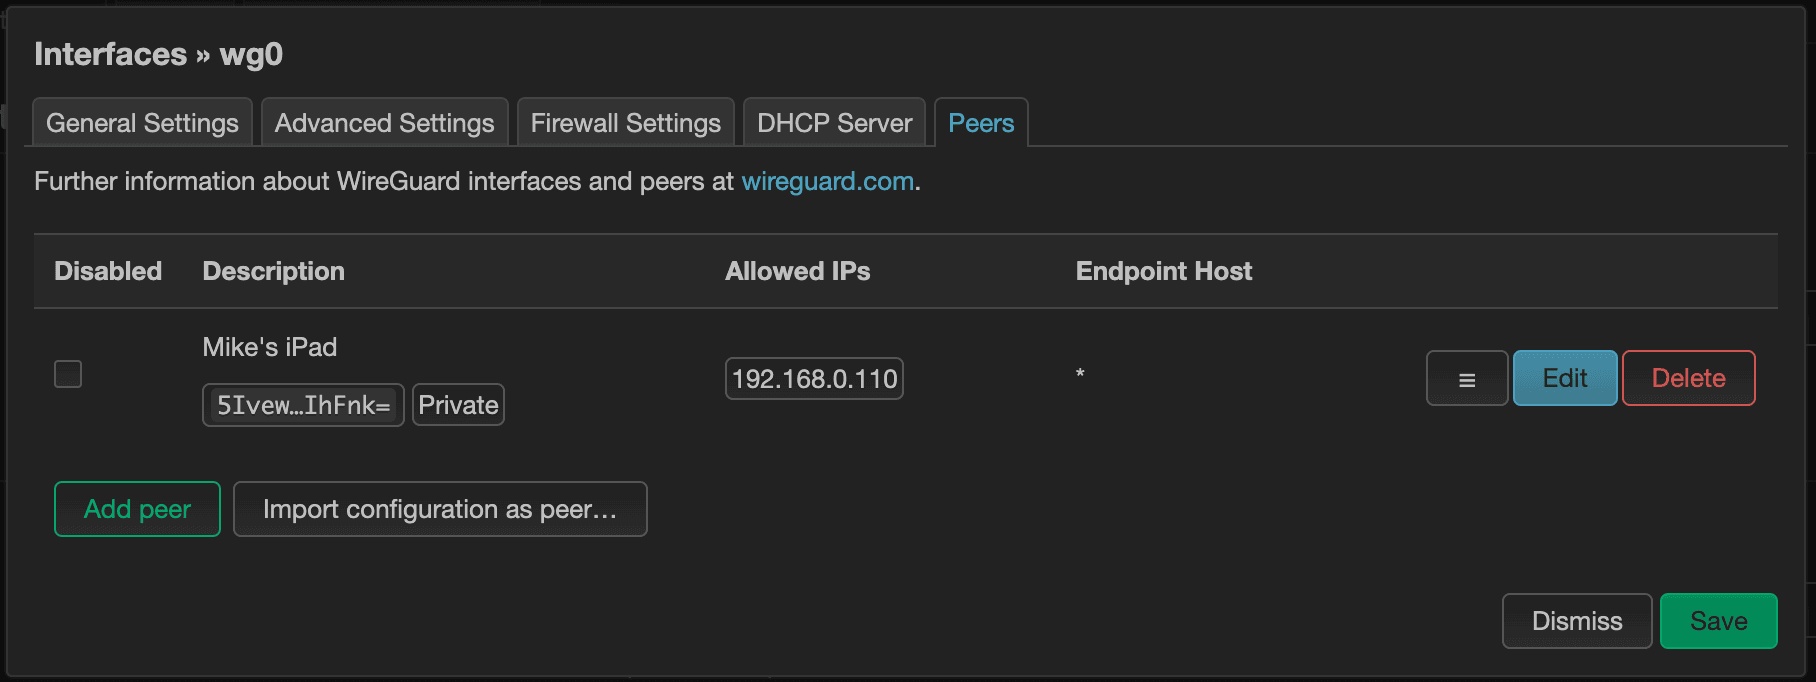
A peer in WireGuard land represents a device that will have access to connect. We'll want to be sure to create a new peer for each unique devices. Navigate back to Network > Interfaces page and edit the “wg0” interface. On the far right-hand side, you'll see the “Peers” tab. Switch to the “Peers” tab and click the “Add peer” button below.
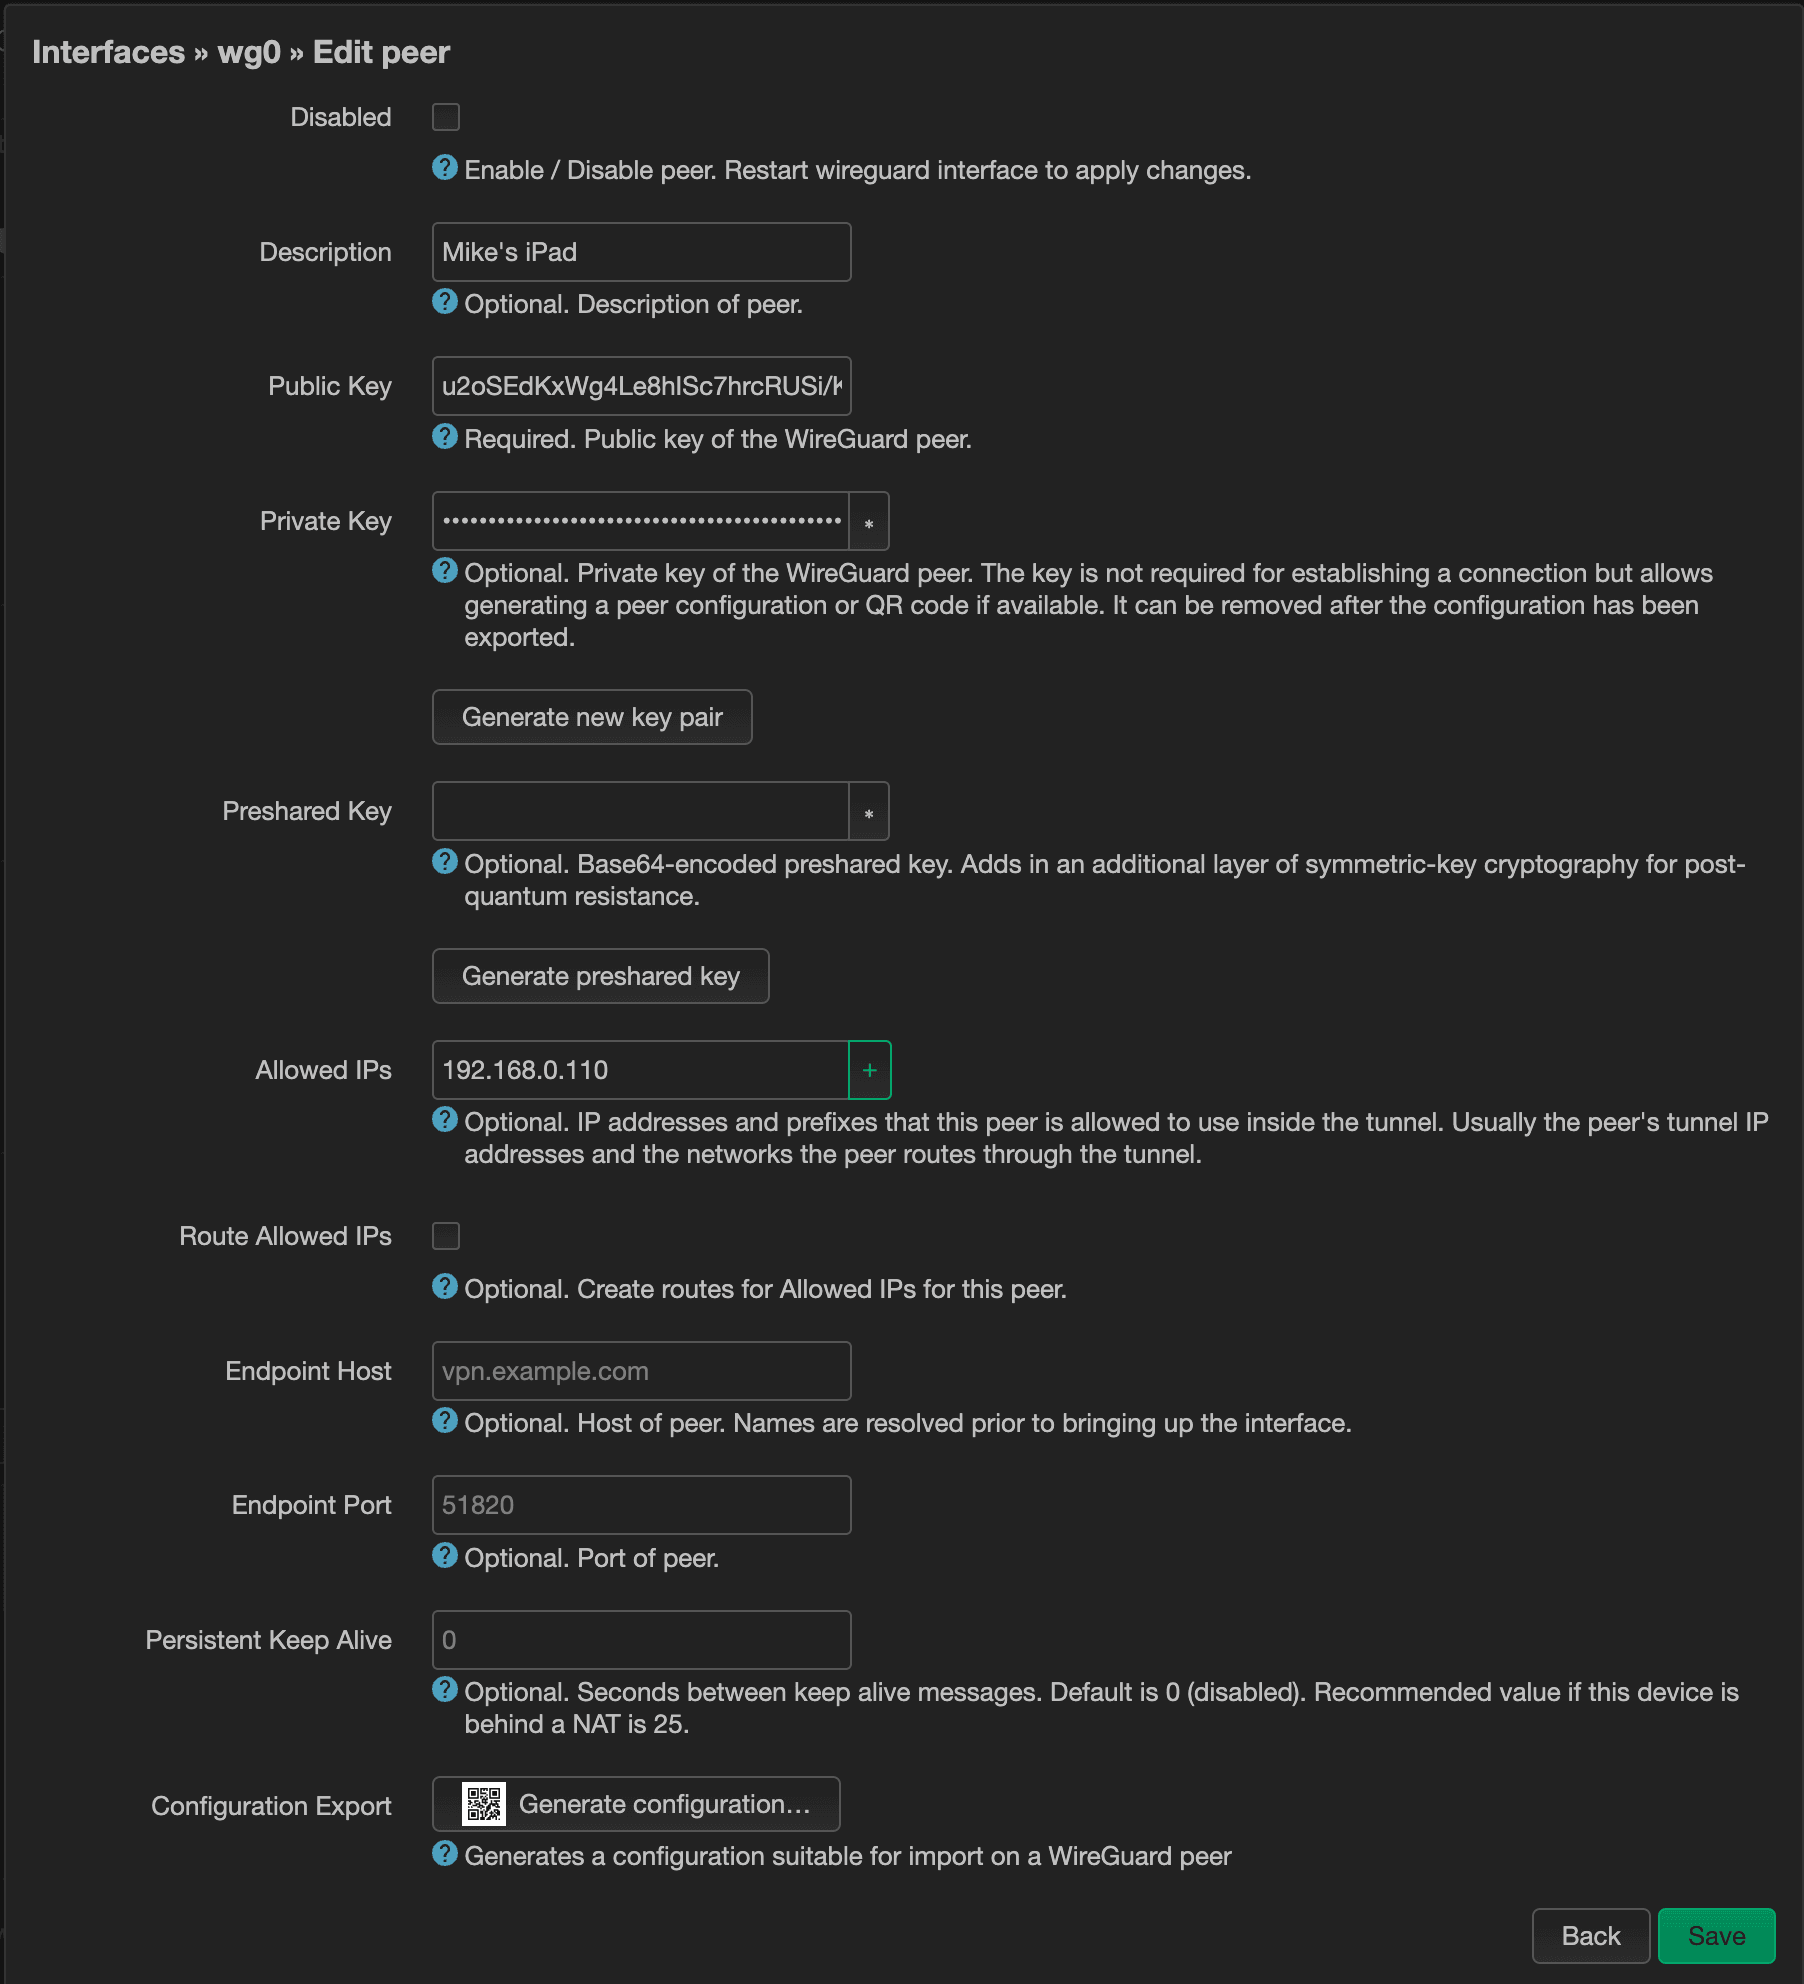
Give this peer a name and click “Generate new key pair” to generate new public & private keys.
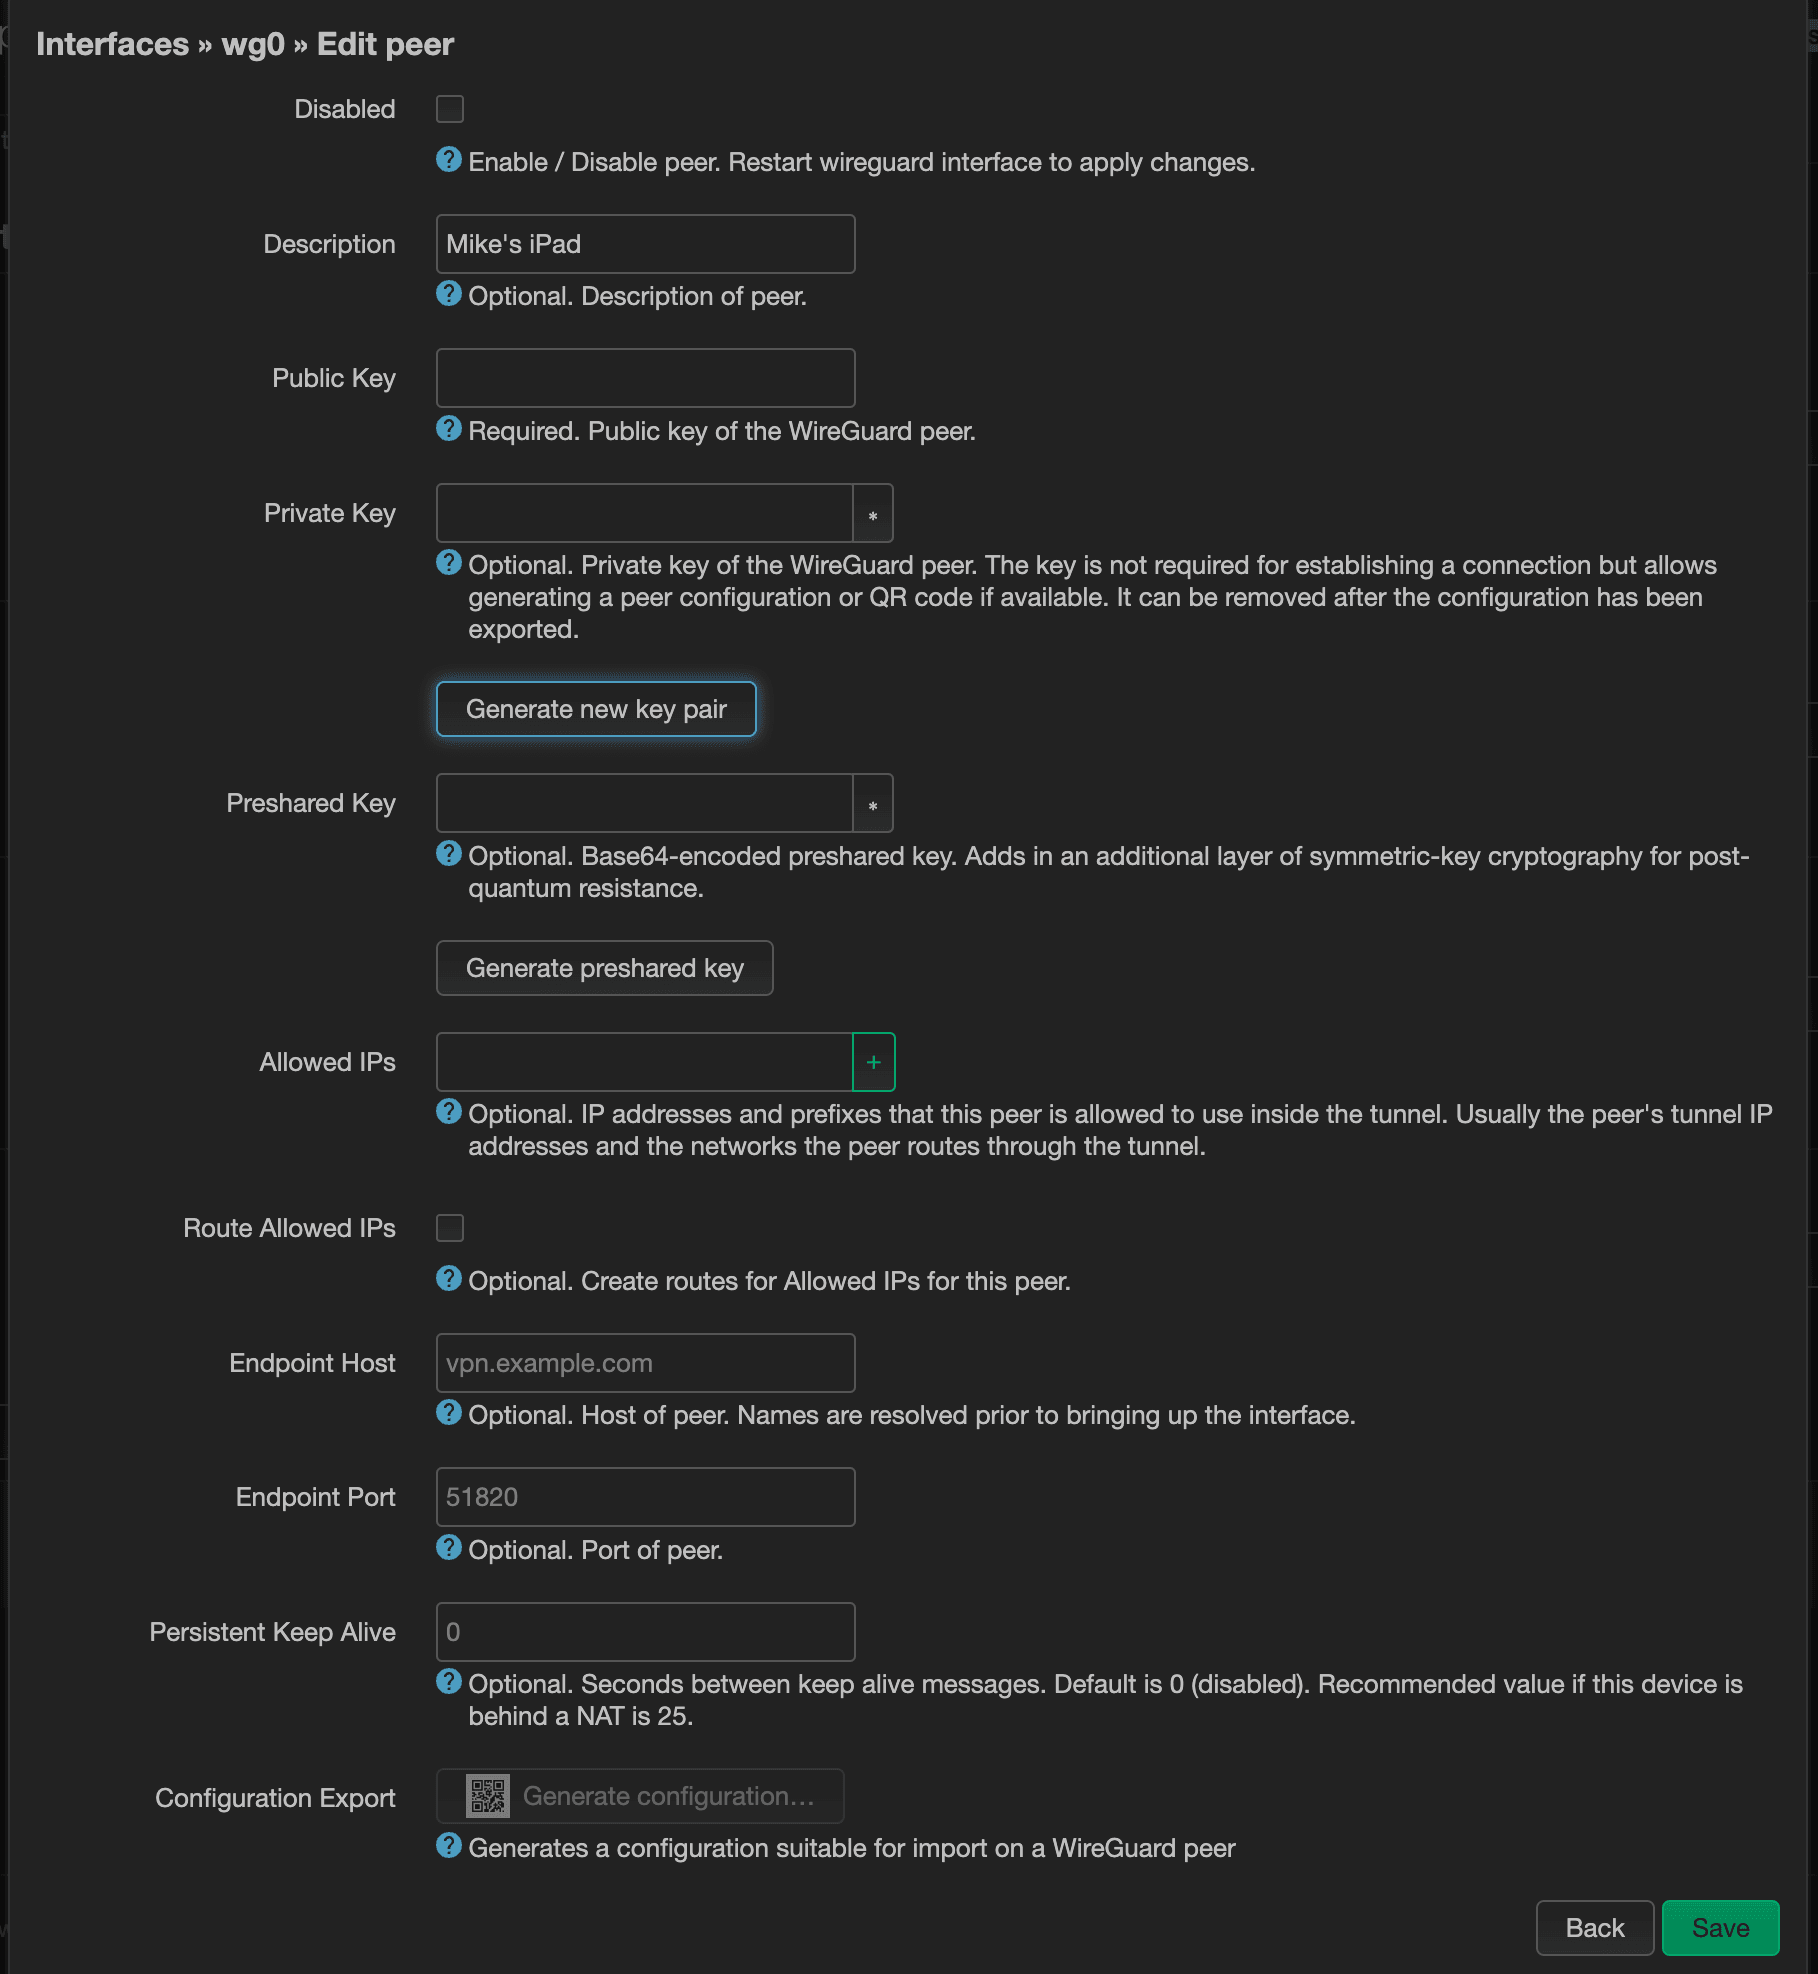
Next, let's assign a static IP address by entering it in Allowed IPs. This should be within the range that we specified earlier. You can optionally set the Endpoint Host and Endpoint Port here. These will be values to specify how your devices will connect to the WireGuard server. I recommend using a dynamic DNS server, instead of an IP address. Unless your ISP assigns you a static IP address, that IP address is more than likely to change over time.
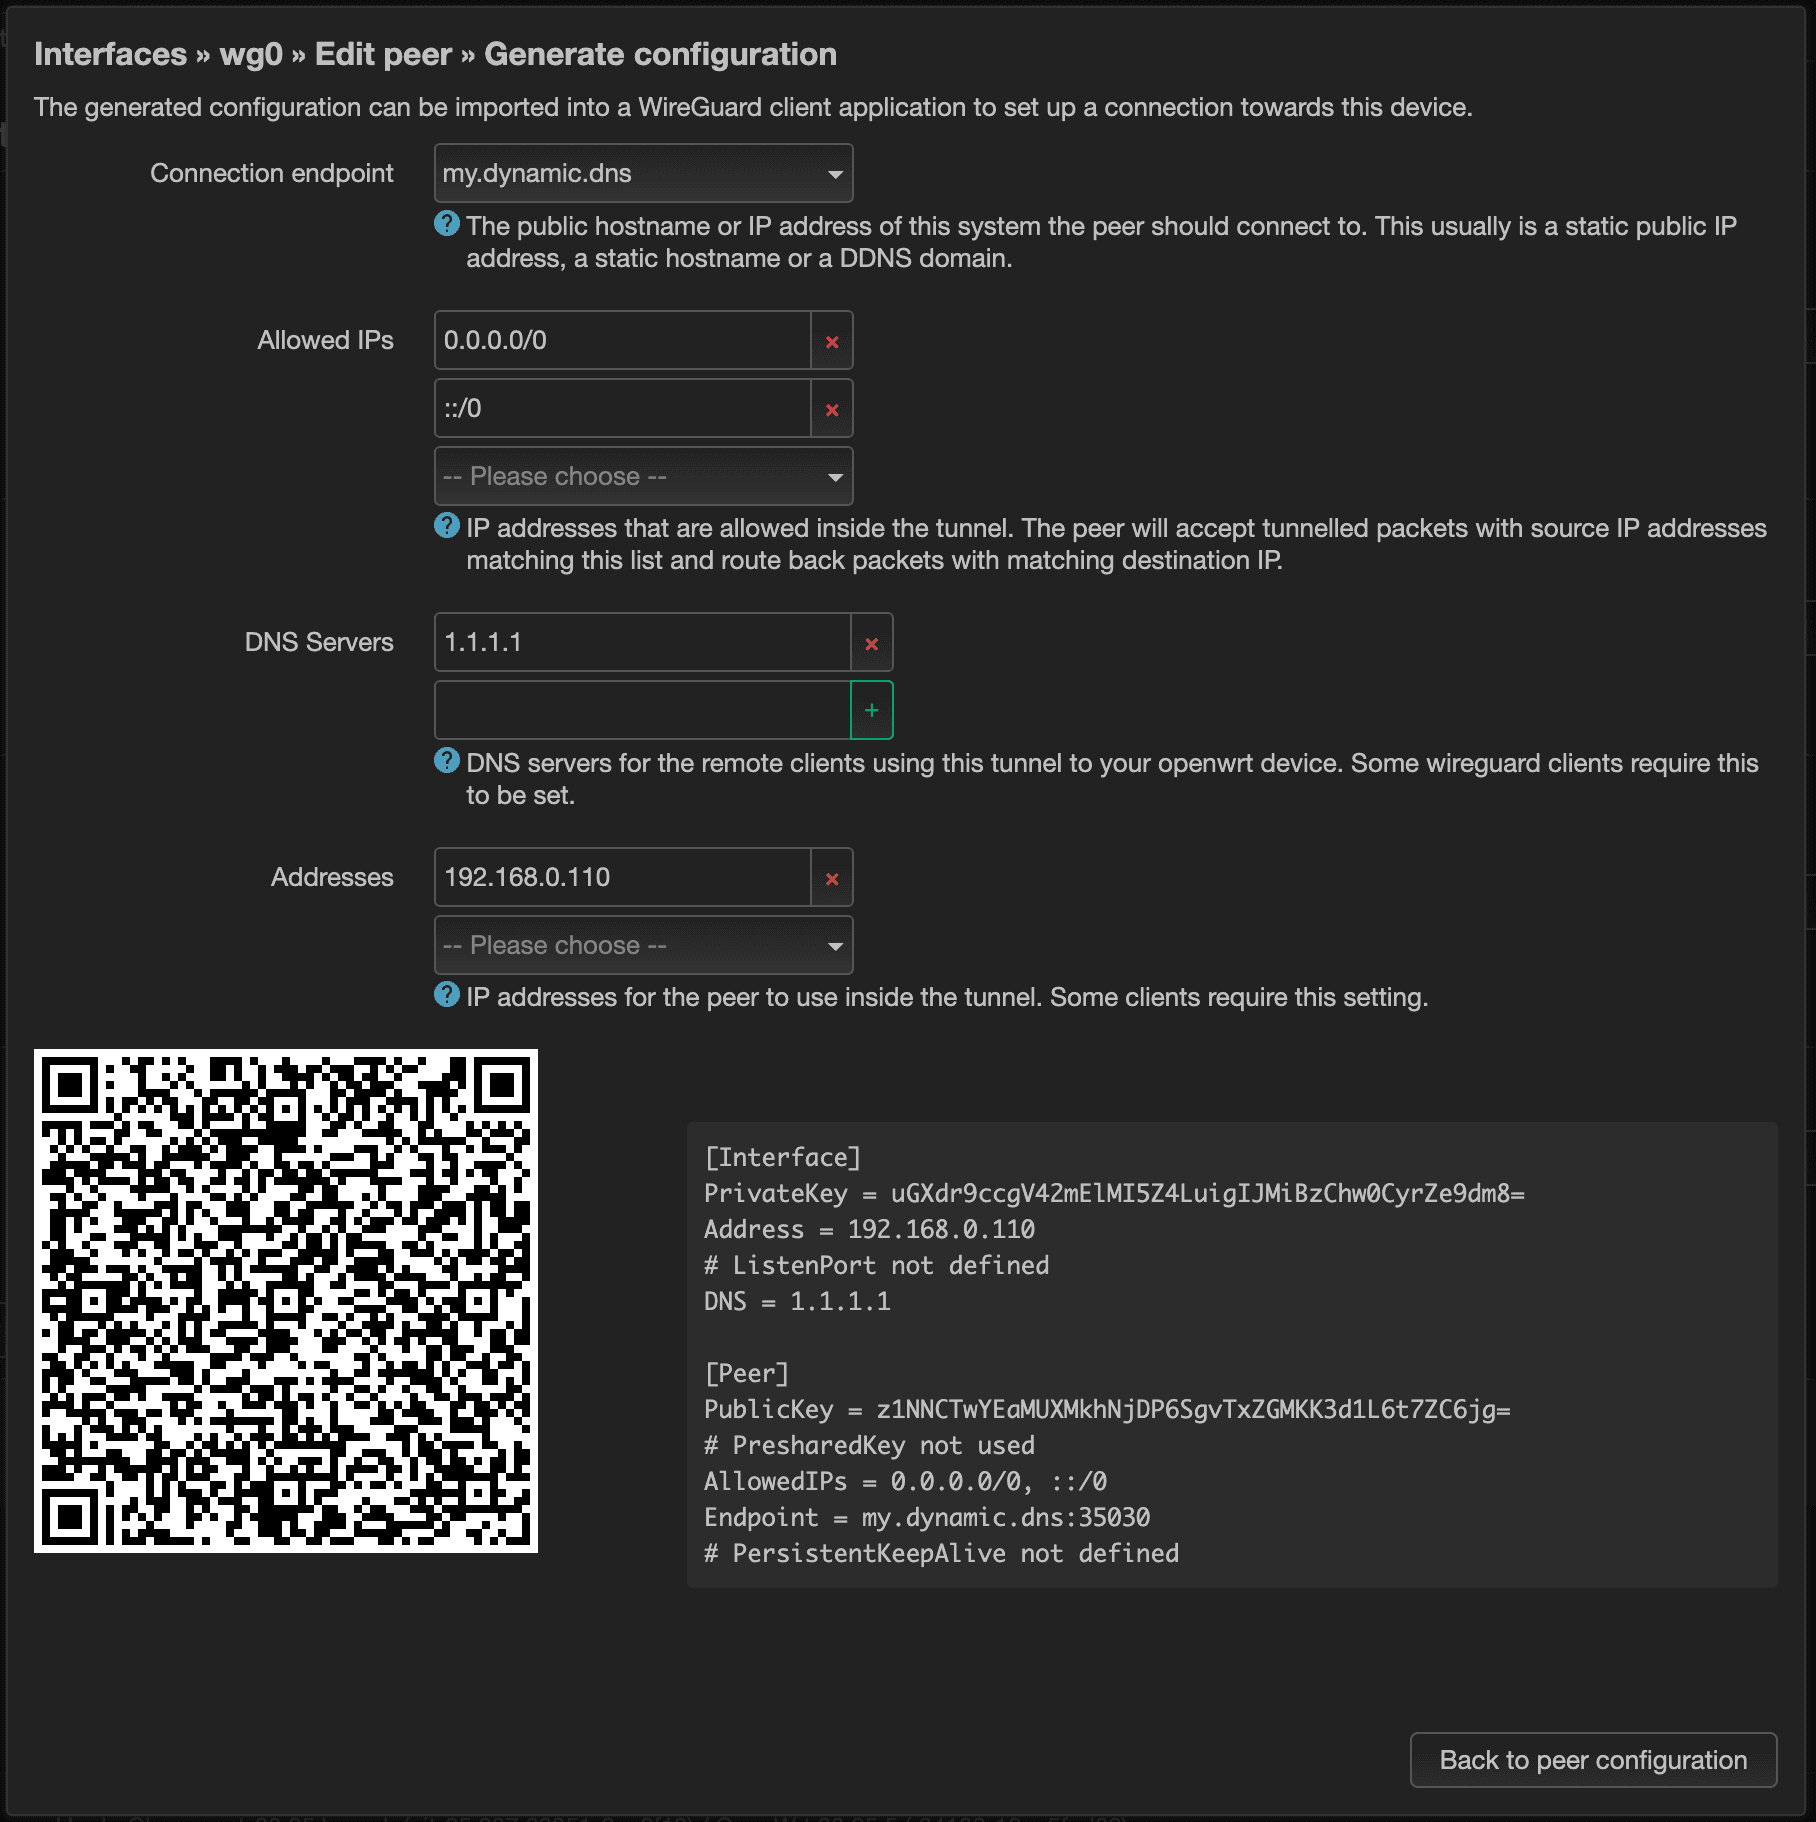
Once you feel like you're satisfied with the settings, it's now time to pass that over to your device. The easiest and most secure way to do that is to click on the “Generate configuration…” button at the very bottom.
That will generate a QR code. If you're using a WireGuard mobile app, it will likely come with a QR code scanner. You can use the camera on the app to scan the QR code that's generated. It certainly beats having to manually type the settings over by hand, or worse, copying and pasting to some third-party cloud-based service, such as email.
Rinse and repeat for all the other peers you want to add in this step.
Once you're done, it may be good to restart the interface, and you should be good to go.